Tomato Salad (Salads)


tomato salad:onion closeup


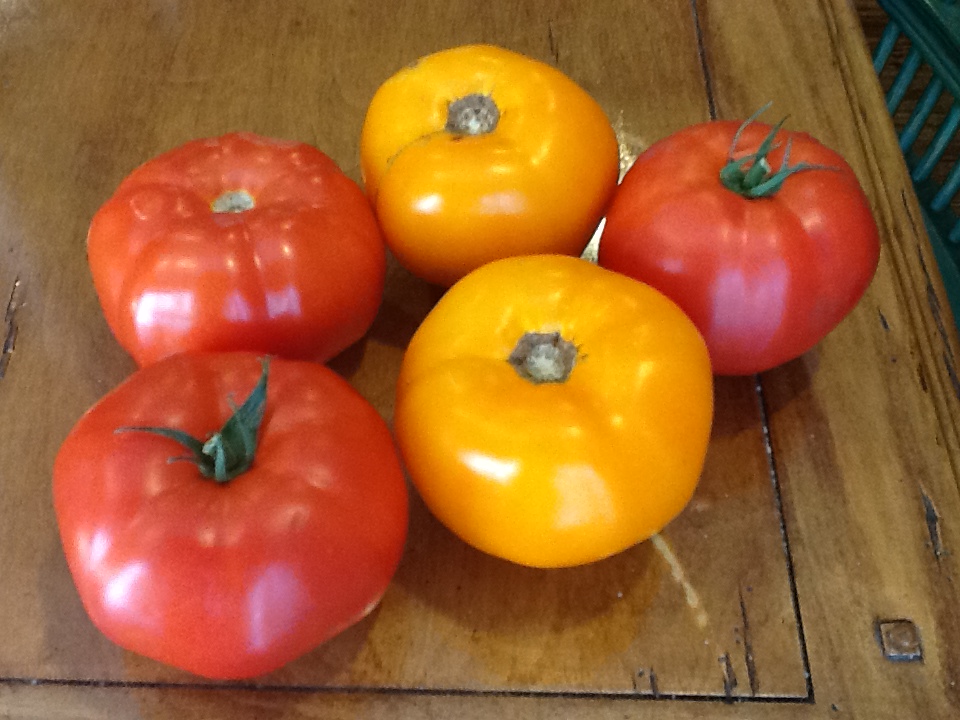
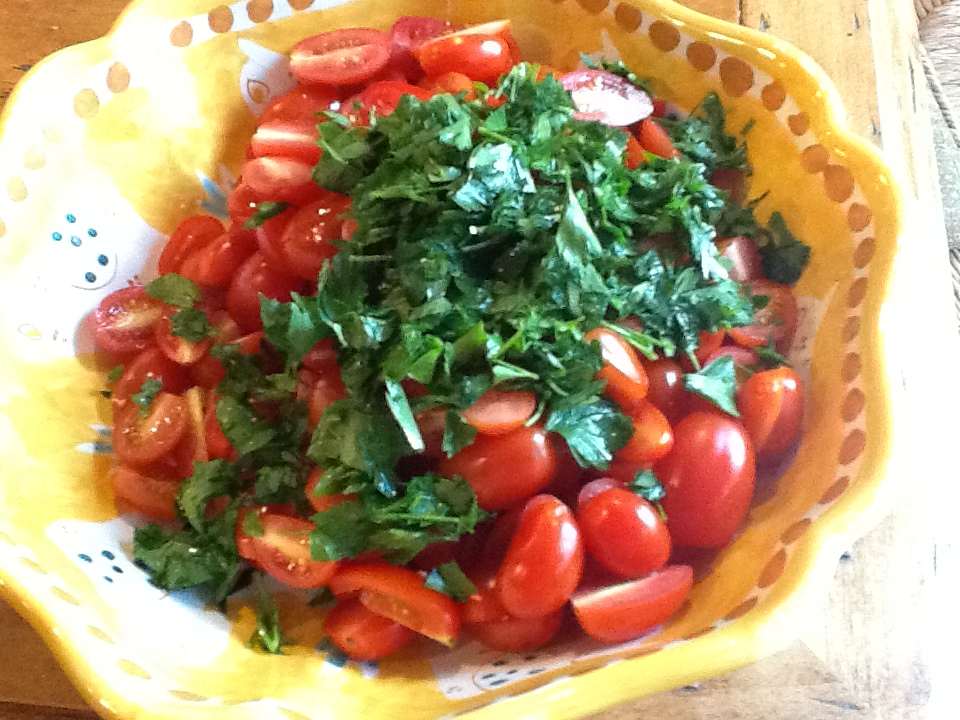
I have so many memories wrapped up in tomato salad, and they’re not all good.  Well, not bad really, but my first introduction to this dish was not favorable.  Actually, I hated it. When I was in my early teens, I spent several weeks, each August at the Jersey Shore with my aunt, uncle and cousins.  My aunt was a wonderful cook, but every night, my uncle insisted on cutting up those big, red, Jersey tomatoes and making a salad of the with red onions, olive oil, oregano, salt and pepper.  Yuck!  I could hardly swallow them.  I liked my tomatoes cooked and over pasta!  My uncle insisted that this was a very healthy way to eat tomatoes, so he would insist that I eat at least 2 pieces of tomatoes every night.  It was torture, but if we wanted to go to the boardwalk after dinner, we had to eat the tomatoes.  So I did.  For these two weeks, every summer, I gagged on tomatoes at the dinner table, but made it to the boardwalk every night.  This wasn’t anything that my mom made, so I didn’t have to encounter another tomato salad until the following year.  

Years passed, and I never ate another tomato in this manner.  Sure, a slice of tomato on a sandwich was fine or in between two pieces of mozzarella, but not as a salad.  Then one day, I was served this exact same salad, and actually liked it.  Had tomatoes gotten tastier or had my tastebuds matured?  I’m not sure, but now I love this salad so much, and look forward to buying  Jersey tomatoes each summer at the farm stands.  I find I obsess over summer tomatoes, just as I do corn on the cob.  What would summer be without them?  Because of this obsession with tomatoes, I change the salad nightly.  Sometimes I make it with basil, oil and garlic.  Sometimes I add cucumbers and bread chunks.  But my favorite way is the way my Uncle Nino made it all those years ago.  I think of him when I dive back into the bowl for well over 2 pieces of tomatoes.  Isn’t there a saying, “tomatoes are wasted on the young?”  Sorry, I think that actually was “youth  is wasted on the young.”  Well, that too.  

I’m going to share the recipes for my 3 favorite ways to prepare tomato salad.  Hurry, before the summer tomatoes are gone and give it a try.  Let me know which way is your favorite.  I hope you don’t gag!  Just kidding!  

RECIPE:  tomatoes with red onion     serves 4

4 large Jersey tomatoes ( I sometimes mix in yellow tomatoes as well)

1 medium red Bermuda onion

1/2 cup good extra virgin olive oil

1 1/2  tsp salt

1 TBSP oregano

ground pepper to taste

1 TBSP cold water

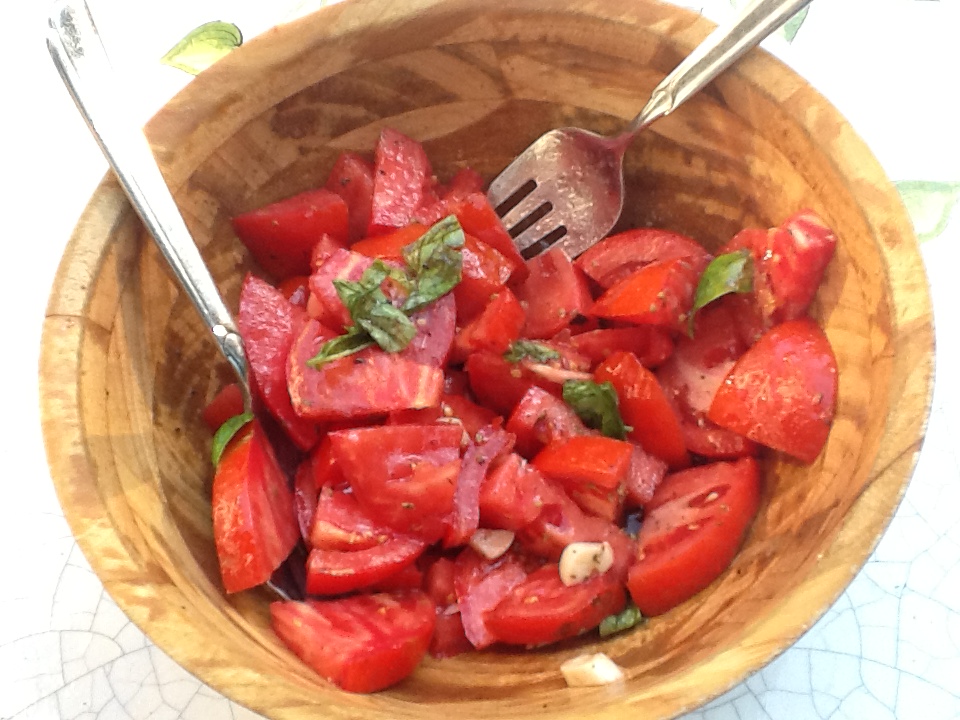
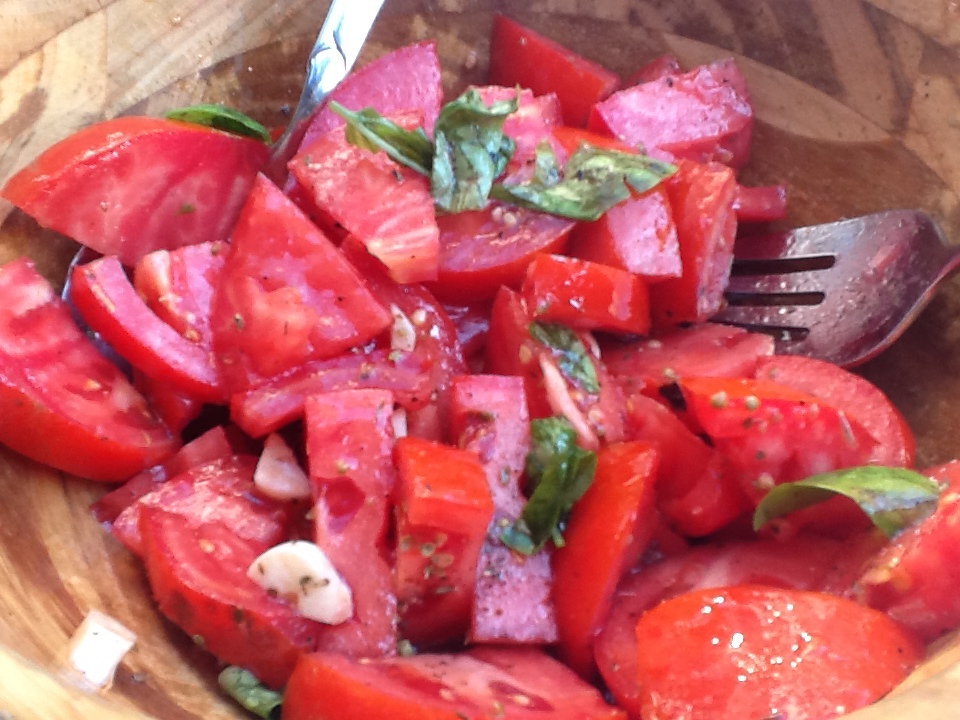
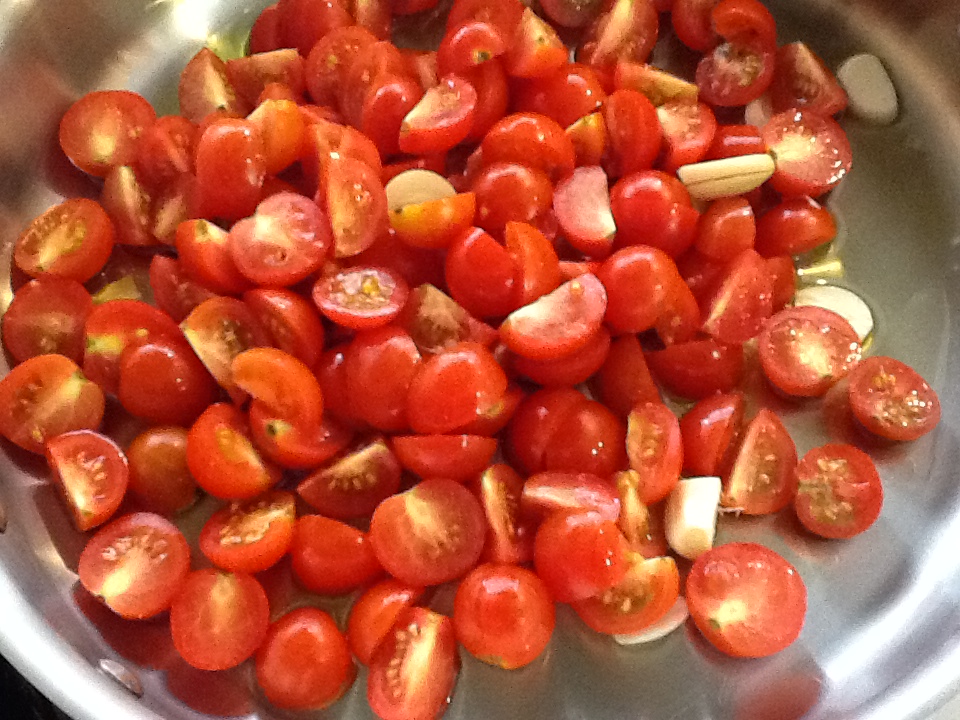
1.  Cut tomatoes into bite size chunks.

2.  Slice the onion, not too thin.

3.  Put in serving bowl. Sprinkle with salt, oregano and pepper

4.  Pour olive oil over tomatoes and add the water.  Mix well, adjusting seasonings.  Tomato taste varies, so you may need to add more seasoning.

5.  Sometimes I chill it in the fridge for half hour, but absolutely not necessary.  This is what my uncle did, so this is what I do.

RECIPE:  tomatoes with garlic and basil    serves 4

4 large Jersey tomatoes, cut into bite size chunks

4 to 5 garlic cloves, sliced

1/2 cup torn basil leaves

1/2 cup good extra virgin olive oil

1  1/2 tsp salt

ground pepper

1.  Combine tomatoes and garlic in a serving bowl. 

2.  Add the salt, pepper and olive oil.  Mix well.

3.  Add the basil and toss well.  Adjust seasonings.

4.  Let sit for 30 minutes before serving.  Mix again before serving.

RECIPE:  Panzanella Salad      serves 4 to 6

2 to 3 Jersey tomatoes, cut into small chunks

1 cucumber, thinly sliced (optional, but I love to add this)

2 cups stale Italian or French bread, cut into bite-size chunks

1/2 cup chopped red onion

1/4 cup red wine vinegar

1/2 cup good extra virgin  olive oil

1 1/2 tsp salt

ground pepper to taste

1.  Combine all the ingredients in a serving bowl large enough to hold everything.  Mix well.  

2.  Let stand for an hour or two, making sure the bread has absorbed all the liquid.

3.  You can also put this in the refrigerator to chill for half hour, if you like.


tomato salad:tomatoes


tomato salad:onion closeup2tomato salad:garlictomato salad:garlic closeuptomato salad panzanella*


Barefoot Barbecued Pork Tenderloins

barefoot pork sliced close up**Is it possible that Labor Day is less then a week away?   As the days start to get shorter,  I can’t help but ask myself, “Did I grill enough?”  I do admit to shoveling a path through the snow to my grill all winter long, but there’s nothing like sitting on the deck, with a glass of wine ( or 2), while taking in the warm air, fading sunlight, and delightful aroma coming from the grill while preparing dinner.  It’s just not the same, when you’re wearing your winter coat, gloves and hat, and running in and out of the house to stay warm, while watching the food cook.   Sure, the food still tastes great, but the ambience is ruined by the freezing temperatures and shivering body.   So as summer starts to fade, I’m determined to get as much grilling as possible into my culinary life.

One of my favorite grilling recipes comes from The Barefoot Contessa.  It is easy, fool-proof, and scrumptiously delicious. I have revised it a bit as I like a bit more herbs, and as you might expect, I’ve added a bit more lemon.   Grill up some corn on the cob and baking potatoes (sweet potatoes are also fab on the grill) ) beside it, and pair it all with a lightly dressed green salad, and you’ve got yourself a fantastic meal that screams “summer!!!”

The beauty of this recipe is that you marinate the meat overnight, or for at least three hours, in a large plastic zip-loc bag, so there is no mess, and you can forget about the meal until you are ready to put it on the grill.


RECIPE:

Grated zest of 3 lemons

1/3 cup freshly squeezed lemon juice ( 4 to 6 six lemons)

1/2 cup olive oil

6 cloves, minced garlic

2 TBSP fresh minced rosemary leaves, plus some stalks for garnish

2 TBSP chopped fresh thyme leaves

3 Tsp. Dijon Mustard

Kosher salt

2 to 3 pork tenderloins, about 1 pound each

Freshly ground black pepper

1.  Combine the lemon zest, lemon juice, olive oil, garlic, rosemary, thyme, mustard and 2 tsp salt in a sturdy 1 gallon resealable plastic bag.

2.  Add the pork tenderloins and turn to coat with the marinade.  Squeeze out the air and seal the bag.  Marinate the pork in the refrigerator for at least 3 hours but preferably overnight.

3.  Brush the grill with olive oil to prevent sticking when ready to cook. Remove the tenderloins from the marinade.   Discard the marinade, but any herbs that stick may remain.  Sprinkle the meat generously with salt and pepper and place on a hot grill.

4.  Grill the tenderloins, turning a few times to brown on all sides, for 15 to 20 minutes (depending on the heat of the coals) until the meat registers 137 degrees at the thickest part.  Transfer the tenderloins to a platter and cover with aluminum foil.  Allow to rest for 10 minutes.

5.  Carve in 1/2 inch thick diagonal slices.  the thickest part of the tenderloin will be pink ( that’s okay!) and the thinnest part will be well done.  Season again with some salt and pepper and serve warm, garnished with more rosemary and thyme, if desired.

barefoot pork ingredientsbarefoot pork marinade 1barefoot pork marinade 2barefoot pork on grill 1barefoot pork on grill 2barefoot pork platedbarefoot pork plated 2*


Lemon Cake (Mamma Agata’s Dolce al Limone)

lemon cake dish **When did my love affair with lemons begins?  It began over 25 years ago, on my first trip to the Amalfi Coast in Italy.  I’d never seen a lemon the size of the lemons that are grown everywhere there.  As you drive along the roads, or walk through secluded paths in the hills, these brilliant yellow lemons, the size of small grapefruits, are hanging from trees for as far as the eyes can see.  Just picture Van Gogh’s painting the “Sunflowers.”  Now picture large, bright yellow lemons in place of the sunflowers, and you now have the same image in your mind as I do when I recall the Amalfi Coast.  If this isn’t enough to make one fall in love with lemons, let me speak of their aroma and taste.  While walking through a small lemon grove, or even a path with a few scattered lemon trees, you are overcome with the scent of citrus wafting in the air, caressing your nostrils. Okay, I’m getting a bit carried away, but I truly can get overwhelmed by this memory.  Each time I return to this “paradise, I am overcome again.   Their taste is sweet, and can be peeled and eaten on the spot.  Sometimes, you don’t even need to peel them.  The skin is that good.  The zest from these lemons is enough to put me over the top.  So you can just imagine how I felt when I arrived at Mamma Agata’s Cooking School in Ravello, Italy this past June, and they placed a piece of this scumptous, moist lemon cake in front of me with a cup of cappuccino.  Heaven?  Yes, heaven!  The citrus aroma!  The yellowness (is that a word?) of the cake!  The taste!  The unbelievable taste!  The love affair continues!

Now how would I ever duplicate the taste of this cake back in the northeast USA?  Our lemons (even the expensive, and slightly larger ones) can’t compare.  But I had to try.  And try I did, several times, and I finally feel that I have gotten as close as I possibly can to simulating a lemon cake that was originally made where lemons abound in all their glory.

A few things to make note of are:

Use “00” flour.  This is what Italians use to bake.  You can now find it in some supermarkets.  You can try the web as well, or  even http://www.mammaagata.com .   Pastry flour will do if you can’t find it.

Use a non-stick Bundt type pan.  If you are having a large party and really want to impress, buy Mamma’s large pan off her website and double the recipe.

Use the juiciest lemons you can find.  Beauty is meaningless here.  It’s the juice that counts.

Be prepared to want to consume the entire cake yourself.  It’s not easy to share, especially when a love affair is involved!

RECIPE:

1 1/4 cups sugar

2 sticks of butter at room temperature, plus extra for greasing the pan

4 eggs

Grated zest of 3 large lemons (USA standards), or 5 to 6 small ones

A pinch of sea salt

2 cups “00” flour or white pastry flour

4 1/4 tsp. baking powder

1/2 cup whole milk

1/4 cups hazelnuts, chopped (optional)

Lemonade Mixture:

1 1/4 cups water

Juice of 3 large lemons , or 5 to 6 small ones (use the lemons you zested)

8 TBSP sugar

1.  Preheat oven to 350 degrees.

2.  Butter the non-stick Bundt pan and coat lightly with flour.  Shake out the excess flour.

3.  Whip the butter in a mixing bowl on high speed for at least 2 minutes.

4.  Add the sugar and continue to whip until soft cream forms.

5.  Mix the baking powder into the flour and set aside.

6.  Add the eggs, one at a time and then add the salt and grated lemon zest.

7. Alternate adding and blending a little of the flour mixture and the milk into the mixing bowl until all used up and blended into the batter.

8.  Mix the ingredients on medium speed for about 5 minutes until the batter has a light and airy consistency, similar to a mousse.

9.  Pour the batter into your prepared pan and bake for 45 minutes in the pre-heated oven.

10.  While the cake is baking in the oven ( do not open oven door to peek or cake will not rise properly), prepare the lemonade mixture.

11.  Squeeze the lemons into a pitcher.  Add the sugar to the lemon juice and stir until dissolved.   Add the water and stir well.

12.  Once the lemon cake is finished baking, let it sit for 2 hours outside the oven until it is room temperature.

13.  Before we start adding the lemonade, you must make sure the cake does NOT stick to the pan.  Place a plate on top of the pan and gently tip it over to dislodge the cake from the pan.  Once the cake has come nicely out of the pan, gently place it back into the pan so we can begin pouring the lemonade. If your cake doesn’t come out of the pan, place it back in the oven for several minutes.  This will warm up the butter and allow it to release.

14.  Over the course of 30 minutes, pour some lemonade over the entire cake every 10 minutes.  This allows the cake to absorb the lemonade.  After 30 minutes ( and 3 pours around), you should still have some lemonade in the pitcher.  At this point, tip the cake out of the pan and on to a serving plate.  Add the remaining lemonade to the top of the cake, distributing it evenly over the cake.

15.  Garnish the cake with the chopped hazelnuts.  If you prefer not to use nuts, a simple sprinkle of confectioners sugar will do nicely.

16.  Let the love affair begin!

lemon cake ingredientslemon cake batterlemon cake batter in pan2lemon cake lemon squeezelemon cake baked:panlemon cake dish closeuplemon cake cut 2lemon cake lemonade


Maria’s Poolside Pasta

poolside pasta *?

This is one of my favorite summertime pasta recipes.  I already know what you’ll be thinking when you read the list of ingredients.  “Not another pasta recipe using cherry tomatoes and/or zucchini!”  I understand.  It is a bit much, but I simply must share this recipe, too.   You’ll be glad that I did.  I love these ingredients, especially in the summertime.  What makes all these recipes different from one another is simply the preparation.  There are probably countless other ways to combine these wonderful flavors of summer, but I promise this will be my last……until next summer.

My first memory of this recipe was at a Sunday dinner, poolside at my sister-in-law and brother-in-law’s house.  The setting was beautiful.  We sat under a beautiful trellis, overlooking their pool and gardens.  The perfume from the flowers was heavenly.  Just when we thought things could not get any better, out came this beautiful bowl of pasta.  I can still remember the beauty of this dish, with the colorful green and yellow zucchini, tomatoes, basil and pesto sauce.   But it was the aroma that really drew me in. Everything smelled so fresh and fragrant.  It was love at first bite for me.  I was fortunate enough to have enjoyed this dish on several other occasions, poolside, but eventually I was smart enough to watch my sister-in-law make it.  It wouldn’t be summer, if I didn’t recreate her dish at least once.  And when I do, I don’t even notice that I don’t have a pool. I’m just soooo happy with each delectable bite!  I know you will be too.

RECIPE:  serves 4

1 pound of farfalle pasta, Maria’s usual choice, but any short pasta will do.  I used mezze rigatoni here

2 pounds cherry tomatoes, halved  or quartered

4 medium zucchini, yellow and green, sliced 1/4 inch rounds

1/2 cup extra virgin olive oil 

1/2 cup pesto sauce (store bought is fine, but homemade is better…see my archives for recipe)

several fresh basil leaves, torn, never cut.

1 tsp sea salt

1/2 cup pasta water, reserved

grated Parmigiano cheese

1.  Put olive oil and tomatoes in a large skillet.  Sprinkle with the sea salt.  Cover and cook on low heat for 10 minutes, or until the tomatoes start to break down a bit.

2.  Add the zucchini, stir and cover once again for 5 minutes or so, until the zucchini starts to soften a bit.  Add the pesto sauce.  Stir well, and heat through for about 5 more minutes.  

3.  Bring a large pot of water to a boil.  Cook the pasta until al dente.  Before draining, reserve the pasta water and set aside.

4.  Add the pasta to the sauce in the skillet and toss well.  Add some of the reserved pasta water if you feel necessary.  Add some of the grated cheese, the basil leaves and put in a large serving bowl.

5.  Serve with grated cheese.

poolside pasta ingredientspoolside pasta pestopoolside pasta zucchinipoolside pasta tomatoespoolside pasta sautepoolside pasta sauce 1poolside pasta sauce close uppoolside pasta bowlpoolside pasta bowl 2poolside pasta closeuppoolside pasta recipe

Traditional Pasta with Zucchini

Mamma A pasta with zucchini bowl

I know that I already have posted several recipes  for pasta with zucchini, but it’s that zucchini time of year here in New Jersey, so I find myself constantly trying to figure out new ways to prepare them.  Of course my mind is always drawn to the idea of putting whatever it might be on top of pasta.  Generally, you can’t go wrong with this decision.  So while I was daydreaming about the situation, I recalled the many times I’ve had a pasta dish with zucchini while traveling through Italy.  This is especially true of southern Italy, where it is quite popular due to the abundance of zucchini growing everywhere.   I went to several of my cookbooks on Southern Italian cuisine, and came upon a very interesting finding.  There is always a very pungent or smoked cheese added to the dish.  I couldn’t quite understand this combination.  Why add such a heavy taste to such light ingredients, but I’m game to try almost anything when it comes to pasta.  So I added a smoked gouda, to what was basically the same recipe I grew up with and have made for years, and was pleasantly surprised.  I felt like I was back in Positano, dining at Da Vincenzo’s.   The addition of smoked cheese is what makes this recipe different from any other I have made. This is why I love to cook so much.  There is always something new to learn.  I thrilled the family with this recipe, and that too, always makes me happy.

So if you’ve been staring at some zucchini lately, and wondering what the heck to do with them, have I got the recipe for you!  


RECIPE:  Serves 4

1 pound pasta, penne or rigatoni

2 to 2 1/2 pounds zucchini, cut into 1/4 inch discs

1/4 to 1/3 pound smoked gouda, smoked mozzarella or provolone, chopped into small chunks

1/3 cup grated Parmigiano cheese

4 TBSP extra virgin olive oil

2 garlic cloves thinly sliced

8 to 10 large basil leaves (torn…never cut)


1.  PLace the sliced zucchini in a colander or bowl and sprinkle with a little sea salt.  Let thm sit for 5 to 10 minutes , to drain some of the water from the zucchini.

2.  Add the olive oil and the sliced garlic to a large non-stick skillet.  Cook over a low flame until golden brown.  

3.  Add the zucchini, a pinch of salt and the torn basil to the oil and stir.

4.  Cover and cook for 5 minutes, then take the cover off and cook for another 5 minutes, or until zucchini start to soften.

5.  Cook the pasta in salted water until al dente, and then drain.

6.  Add the pasta to the pan with the zucchini.  Stir all the ingredients well and continue to cook over a low flame for a few additional minutes.

7.  Add the chunks of cheese and half of the Parmigiano at the very end and stir well to combine.

8.  Remove from the heat, plate and serve with the remaining Parmigiano cheese.


Mamma A zucchini sauteMamma A pasta with zucchini saute2Mamma A pasta with zucchini in panMamma A pasta with zucchini bowlMamma A pasta with zucchini bowl 2Mamma A pasta with zucchini platedMamma A pasta with zucchini plated2


Basic Blueberry Pie (with a secret worth knowing)

blueberry pie baked


It’s summertime, and the season for fresh fruit pies!  I buy seasonal blueberries, peaches and cherries by the bushels, and love to dream up recipes, but I especially love to whip up a pie using this fresh bounty of the season.  I didn’t always feel this way about pie-making.  Making the crust scared me.  As a relatively new baker, I would toil for hours over the measuring and mixing of the ingredients to make the perfect crust, and very often had to start over and over again in frustration, until that fateful day, when a friend shared a secret that has changed my “pie-making life” forever.  

It was the summer of 1988.  I was struggling (or should I say fighting) with what claimed to be a “no fault pie crust,” when my friend came to pay a visit.   She was entertained watching me and all my frustration.  I gave up in disgust, and decided to turn this into blueberry cobbler.   I could handle that.  Later on that afternoon, as we sat and enjoyed the cobbler, my friend let me in on  her secret for perfect pie crust every time.  I was sworn to secrecy, and I have kept that secret for over 25 years…….until now.  So for all you people, who have enjoyed my pies, and thought my crust was to die for, I now confess to using  “Pillsbury Ready Made Pie Crusts.”  Yes, I’ve accepted compliments on my pie crusts and always took full credit, but I had to be true to my friend’s promise.  I will never divulge her name (what are friends for, after all), but my guilt has gotten the better of me.  More importantly, I want you all to realize that this is a great tip that allows you to make a fresh baked pie in no time, and with very little hassle.

Now this is not 100% full proof.  You have to follow the instructions on the box to a tee, and handle with care.  Sometimes I’m impatient, or let the dough sit out too long at room temperature, which can present a bit of a problem.  If the box says, let the dough come to room temperature for 20 minutes, then 20 minutes it is, or it will not unfold nicely.  Being the impatient baker that I am, this has happened to me countless times.  However, I’ve been able to fix the situation with very little effort.  I just clump it all into a ball of dough, roll it out myself, and carry on, usually cutting the dough into strips to form a lovely lattice effect.  My pies are not often pretty (as you’ll see from the pictures), but the taste is always superb.  And that is the point exactly.  With a crust this delicious, beauty is not necessary.  Between the aroma and taste of a freshly baked pie, no one really cares if it can’t go on the cover of a food magazine.  Don’t get me wrong, if you follow the instructions, your pies will be beautiful and tasty, and no one will ever know that you didn’t make the crust from scratch.  

As far as the filling goes, very little needs to be added to the sweet, seasonal fruit, but a little sugar, lemon juice, and cornstarch for binding it all together.  What could be easier?  

I also suggest buying, if you don’t already have, a pie crust shield.  This really saves the crust from burning or getting too dark, while the fruit bakes until soft, yet firm.  I like the fruit (especially berries) to remain whole, not like some pie filling that comes out of a can.  You can always shape aluminum foil into the shape of the shield.  It works well.  

So please give this a try.  Fresh fruit pies will no longer be only for company.  And please remember….it’s a secret!!!  


RECIPE:

1 package Pillsbury Pie Crusts

4 pints of blueberries

1/2 cup sugar

1/4 cup cornstarch

1 TBSP freshly squeezed lemon juice

2 TBSP butter, cut into small pieces

1 egg yoke,beaten, for brushing the crust


1.  Follow ( and I do mean follow) the instructions on the box for the pie crusts.

2.  While crusts are coming to room temperature, wash the blueberries and pick through for stems.  Drain well.

3.  Add sugar, cornstarch and lemon juice.  Stir to combine.

4.  Place the first crust on the bottom of the pie pan, pressing the dough up the sides of the pan.

5.  Spoon mixture into pie shell.  Dot with the butter.

6.  Place the second piece of dough over the berries and seal it all the way around.  You can use your fingers or a fork to crimp as desired. Using a pairing knife, cut several vents in the top dough to allow steam to escape.   Or you can cut the dough into strips and make a lattice top, which also needs to be sealed and crimped.

7.  Brush surface with the egg yolk.

8.  Place in a preheated 400 degree oven for 10 minutes, and then lower the oven to 350 degrees.  Total cooking time should be 45 to 60 minutes, until crust is nicely browned.

9.  Serve slightly warm.  Its wonderful with vanilla ice cream.  

10.  Keep the secret!!!


blueberry pie crustsblueberry pie berriesblueberry pie sugarblueberry pie berries mixedblueberry pie crust 1blueberry pie crust:berriesblueberry pie shieldblueberry pie bakedblueberry pie cut


Pappardelle with Sausage and Red Peppers

Image

I’ve become a bit of a “Mamma Agata Groupie!”  I just can’t stop making (and sharing with you) the fabulous dishes that we made in our cooking class with her.  Since it’s summertime here, I can get fresh, farm produce and am able to almost duplicate the delicate flavors that are characteristic of her cooking.  When we were preparing this dish with her in her kitchen, I was surprised to learn that she was sautéing the sliced peppers in peanut oil.  We’re in Italy.  Why aren’t we using olive oil?  According to Mamma Agata (and I’m a believer/groupie), the peanut oil makes the peppers easier to digest and brings out their flavor.  Who knew?  But now we do know, so this is what I used, and I think you should give it a try also.

You also will need to have a basic tomato sauce on hand for this recipe.  My “marinara sauce” (look through my pasta recipes) will do just fine, but I decided to follow this 100%, so I made her recipe for tomato sauce, which is also quite simple.  I will include it here.  I also used Mamma Agata’s own brand of pappardelle pasta.  I was there, bought it and had it shipped to the USA, and it is sold on her web-site, but this is totally unnecessary.  You can find pappardelle everywhere nowadays.  Just an aside….if you ever see pasta made in Gragnano, buy it!  This is a small hilltop town, above the Amalfi Coast, very close to Ravello, where they make pasta.  This area is famous for their dried pasta.  I actually found it in a supermarket in New Jersey (Kings), and my sister found it in Manhattan (Eataly).  It’s soo good!   It must be something in this region’s wheat/semolina that makes these dried pastas extra delicious.

Please don’t be scared off by the length of this recipe.  It’s very easy.  You can even make the tomato sauce (mine or hers) several days in advance.  The peppers can also be sautéed, and left to drain, well in advance.

RECIPE for Mamma Agata’s Tomato Sauce:

1 quart of vine-ripened roma tomatoes, pureed  (you can find this now in jars in all supermarkets…or use canned)

10 fresh cherry tomatoes

5 TBSP extra virgin olive oil

2 cloves of garlic

3 (or more) basil leaves

1.  Add the olive oil, garlic and basil to the saucepan.

2.  Heat the ingredients over a high flame for a minute or two, being careful not to burn the garlic.

3.  Add the tomato puree and cherry tomatoes to the pan.  Stir.

4.  Cook the sauce, first over a high flame until the sauce begins to boil.  Then, lower the flame to simmer the sauce for a total of 30 minutes ( including the time it took to bring it to a boil).


RECIPE:  serves 4

1/2 pound of pappardelle

2 1/4 pounds of sweet red and yellow bell peppers

3 1/2 TBSP butter

4 TBSP olive oil

1/2 small red or white onion, chopped

1 lb. sweet Italian sausage

2 1/4 pounds of cherry tomatoes

5 fresh basil leaves, torn

1 cup tomato sauce

Peanut oil

1.  Prepare the tomato sauce, if you have not already done so.

2.  Wash the peppers and remove the stems.  Cut each pepper in half and remove and discard the seeds from the inside of the peppers.  Slice the peppers lengthwise, but not too thin or too thick.  (take a look at my pictures)

3.  Saute the peppers in the peanut oil for ten to fifteen minutes, until soft.

4.  Once the peppers are cooked, place them on a paper towel to soak up the excess oil.

5.  In a separate pan, melt the butter and olive oil over low heat.

6.  Add the chopped onion and cook until golden brown.

7.  Add the sausage to the pan and sear on all sides.  Cover the pan and cook for an additional two minutes.

8.  Uncover the pan and pierce the sausage with a fork several times on both sides, to allow the juice to flow in the pan and enhance the flavor of the pasta sauce.

9.  Add the peppers to the pan with the sausage, stirring a bit to place the sausage on top of the peppers.

10. Add the chopped cherry tomatoes, freshly torn basil and one cup of the tomato sauce to the pan.

11. Cover the pan and cook on a low flame for thirty minutes.

12. Once cooked, remove the sausage and slice into small pieces, and then place back into the pan.

13.  Cook the pasta until al dente.  Drain it and add it back into the sauce.  Cook on low heat for two additional minutes.

14. Add a handful of grated Parmigiano cheese and serve immediately.

ImageImageImageImageImageImageImageImageImageImageImageImageImageImageImage


Mamma Agata’s Lemon Chicken (Pollo al limone)

Image

I’m going to treat you again to another wonderful recipe that I made in cooking class with Mamma Agata in Ravello, Italy.  This dish is so flavorful and aromatic that it is a delight to the senses.  Your kitchen will smell like rosemary, sage, garlic and lemons, all mingled together in a manner that keeps the chicken moist.  The amazing thing about this recipe is that you use absolutely no oil.  I couldn’t believe it, but it is indeed true.  The skin on the chicken renders all the fat you need.  You will need to use a non-stick skillet, however.

This recipe calls for  white wine infused with herbs.  Mamma Agata infuses the white wine with baked herbs for 4 days before she makes this recipe, but I did not.  I added the wine and some fresh herbs at the end, and it came almost as good as hers.  I just can’t bring myself to take a good bottle of wine ( always cook with wine that you would drink), and put herbs in it.  Perhaps you want to give it a try.  I’ll include this in the recipe and you can decide for yourself.

This recipe did teach me the importance of a good quality sea salt.  It really makes a difference.  Mamma “A” says to always use sea salt.  I actually bought her own brand of sea salt (of course I did) and the taste was just divine.  So now I’m a believer in using the best sea salt (or any type of salt for that matter) that you can find.

RECIPE:  serves 4 

1/2 to 1 whole chicken, cut into pieces with skin on.

5 cloves garlic,cut in half.

2 tsp. sea salt

1 TBSP dried sage ( I used a bit more).

1 TBSP dried rosemary (I used a bit more).

1 cup wine, or Mamma Agata’s wine infusion (see below)

1 TBSP Italian parsley , coarsely chopped

Juice of 2 large lemons ( or 4 if they’re small)

2 sprigs fresh rosemary

8 leaves fresh sage

Wine Infusion:  to be prepared at least 4 days in advance

1 bottle of white wine

2 sprigs fresh rosemary

8 leaves fresh sage

Place the sage and rosemary leaves in a warm oven for a few minutes until you begin to smell the scent of the herbs.  Then immediately remove them from the oven and place them in the bottle of wine.  Close the bottle and set it aside for at least 4 days.

1.  Wash and dry the chicken well, leaving the skin on.

2.  Add the garlic to a non-stick fry pan or skillet.

3.  Heat the garlic over a high flame until the garlic becomes very hot, but not burned.  Use a wooden spoon to turn the garlic to release its natural oils without burning it.

4.  Add the chicken to the pan, one piece at a time, skins down.  You should hear the chicken sizzle. Add half of the sea salt, rosemary and sage to the top of the chicken.  (Mamma Agata was much more generous with the dried herbs.  I saw her throw in a handful or more, but lets stick to the recipe).

5.  Once the skin of the chicken has caramelized (i.e. golden brown), turn the chicken over.

6.  Add the remaining salt, sage and rosemary.  Cook until this side is caramelized.

7.  After both sides are caramelized, lower the flame, cover the pan and cook over low heat for about twenty minutes.  Do NOT uncover the lid while it is cooking or else it will break the moisture barrier and become dry.

8.  After twenty minutes, the natural juices  should have reduced.  Now uncover the chicken and add the wine (infusion or not) to the pan.  If not using the infusion, add you fresh herbs at this point.  Continue cooking over low heat until the wine reduces.

9.  Just before serving, add the chopped parsley and fresh lemon juice.

NOTE*  You can cook this ahead of time, up to the point of adding the wine and then step #9.


ImageImageImageImageImageImage

mammas chciken recipe

mamma agata book

Mamma Agata’s Spaghetti del Contadino

Image

Have you wondered where I’ve been these past few weeks?  Well, I’ve been in “bella Italia” for three weeks, collecting lots and lots of recipes for you.  Italy is a treat for all your senses.  Visually, you are spellbound by it’s beauty.  The air is perfumed with the sweet smell of flowers, sea and mountains.  And the food delights your taste buds with each delicious bite.  I can close my eyes and still see, smell and taste all that Italy has to offer.  It is my hope to share as much of this with you as possible.

One of our stops on this journey was the Amalfi Coast.  This is my favorite spot in Italy, and I feel blessed to have visited this magical area many times.  The warmth of the people, the breathtaking views everywhere you turn and the fresh food, picked right from the earth or out of the sea, makes for an almost surreal experience.  I would like to share as many recipes as possible from this area with you over the next few weeks.

I spent a day with my sister and niece at the cooking school of Mamma Agata in Ravello.  She’s a legend on the Amalfi Coast for true traditional cuisine of this region.  She’s been cooking in restaurants for celebrities and dignitaries since she was 13.  Now, at 72 years old, she has a highly rated cookbook and a very famous cooking school in her home, high in the hills of Ravello.  Her daughter, Chiara and son-in-law, Gennaro, have joined her in this endeavor, and have created a wonderful experience that will remain a beautiful memory for me for years to come.

The first recipe that I would like to share with you is her “spaghetti del contadino.” Mamma Agata made this for Jackie Kennedy when she was in Ravello.  It is made with all the freshest ingredients, and of course, as Mamma, Chiara and Gennaro say, “cook with love.”  So “love” is a very important ingredient.  Their love of cooking (and sharing) is evident from the moment you walk into this magnificent home overlooking the sea.  You’ll  find this all over Italy.  Food is love.

I hope you enjoy these recipes from Mamma Agata.  I highly recommend her cookbook as well.  My sister gave it to me a few years ago, and it is one of my favorites amongst my vast collection.  As you will see, her recipes are simple and she shares lots of her secrets.  You can also visit her website, http://www.mammaagata.com.  However, if you ever get to the Amalfi Coast, don’t miss the chance to meet and cook with this lovely lady and her family.  It’s a thrill of a lifetime.

NOTE:  I’ve included a few pictures of Mamma Agata’s views from her terrace and kitchen.  Who wouldn’t “love” to cook with those surroundings!!!

RECIPE:  Serves 4

1 pound of spaghetti

1 1/4 lbs of ripe cherry tomatoes

1 TBSP fresh parsley, finely chopped

6 TBSP extra virgin olive oil

4 cloves garlic, finely sliced

1 tsp dried oregano

2 dozen green olives (with or without pits…I definitely like no pits)

2 dozen black olives ( with or without pits)

1 TBSP Capers (packed in salt, if available, and rinsed)

1 cup fresh arugula


1.  Cut the cherry tomatoes in half (if large, cut into quarters) and place them in a bowl with the chopped parsley.  ( Mamma A says this enhances the flavor of the tomatoes.  Who knew?)

2.  Thinly slice the garlic and add it to the room temperature extra virgin olive oil.

3.  Slowly heat the garlic and oil over a very low temperature so that the flavor of the garlic will infuse the oil as it is cooking.

4. When the oil and garlic are warm and have been gently cooked, add the halved cherry tomatoes, parsley, oregano, green and black olives, and rinsed capers to the pan.

5.  Cook until tomatoes have cooked down, and all the flavors have melded.  (She doesn’t  give us cooking time, but I cooked it for about 10 minutes.)  Keep checking and stirring.

6.  Boil the spaghetti until it is al dente.  Drain it, and put it in the pan with the sauce.  Cook, while turning, for and additional 2 minutes. ( this is why it must be taken out of the water al dente)

7.  Add the arugula leaves to the pasta and sauce just prior to serving so that it does not lose its flavor in the cooking process.

8.  Serve hot, with a drizzle of olive oil to further enhance the flavors in the dish.  NOTE:  In Italy, they do not use grated Italian cheese on fish sauces or sauces made with fresh tomatoes.  This was new to us, but I came to understand and enjoy it without cheese.

9.  Don’t forget the “love!”

ImageImageImageImageImageImageImageImageImageImageImageImageImageImageImage


Ribollita Soup

Image


Before summer arrives, and the temperatures start to soar, I just had to share one last soup recipe.  I do enjoy  chilled soups like gazpacho or chilled pea soup, but they’re not something I usually make.  Perhaps I should start, because I love soup!  So before summer sets in, I try to enjoy a bowl or two of piping hot soup.  Ribolita being one of my favorites.

This is not a family recipe, nor is it a recipe from a friend.  This is a combination of about 6 or 7 recipes that I have tried over the years.  As in all Italian “peasant” recipes (this one is from Tuscany), you can really use whatever is on hand.  I love to use dark or red kale, but honestly, any kale will do just fine.  If I can’t find savoy cabbage, I just use regular cabbage.  If I have a leek on hand, I’ll throw it in, but it’s not essential.  Red onion, sweet onion…it doesn’t matter.  I will say that what I think does matter is the quality of olive oil, tomatoes and broth.  So use your favorites.  Please don’t tell anyone, but in this recipe I use canned cannellini beans.  Why not???

I hope you get an opportunity to make this before you start grilling every night.  But if not, please remember it once the autumn air chills our evenings once again.


RECIPE:  about 6  (maybe 8) servings

2 15 ounce cans of cannellini beans

1/4 cup good olive oil

1 large yellow onion (red onion is yummy also)

1 leek, white part chopped

3 carrots, chopped

1 large bulb of fennel, chopped (can also use celery …3 stalks)

4 cloves of garlic, minced

1 tsp. freshly ground pepper

1/4 tsp crushed red pepper flakes

Kosher salt

1 28 ounce can of Italian plum tomatoes, squished

1 large head of savoy cabbage, shredded

1 large bunch of dark kale ( or any kale), coarsely  chopped

2 russet potatoes, peeled and diced in 1/2 inch pieces

6 cups of broth, either vegetable or chicken

4 cups of stale Italian bread, cut into chunks

1/2 cups freshly grated Parmesan cheese, for serving


1.  Heat the oil in a large stockpot.  Add the onions, carrots, fennel and leeks and sauté for 5 to 7 minutes.  Then add the garlic, salt, pepper and red pepper flakes and sauté another 5 minutes.  Add the squished tomatoes and all their juice, the cabbage, kale and potatoes.  Cook, stirring occasionally for another 10 minutes.

2.  Add the broth and beans, and simmer over low heat for 40 minutes.

3. Add the bread and simmer for another 10 minutes.  Taste for seasoning.

4.  Serve hot in large bowls, sprinkled with Parmesan cheese and perhaps a drizzle of olive oil.


ImageImageImageImageImageImageImageImageImageImageImageImageImageImage