1970’s Shrimp with Hoisin Sauce

I had my beautiful baby girl in 1977, and by 1978 I was so excited to make a new friend…especially a friend who also had a new daughter and loved to cook.  It was a friendship made in heaven. We could share stories about parenthood, and we could could share recipes.   We spent our days talking about food and shopping in specialty food stores, looking for any unusual or exotic ingredients.  We would love to load the girls into the car and drive to New York City’s Chinatown to buy all the different veggies and spices that were sold in the markets and on the sidewalk.  One day we came upon a market that was selling a cookbook entitled, “The Gourmet Chinese Regional Cookbook” by Calvin B.T. Lee and Audrey Evans Lee being sold for $3.00.  I had never made a Chinese dish, but I could not wait to give it a go.  This cookbook was to become my bible for Chinese cooking.  I even made Peking Duck from it.  The instructions were to “insert the tube of a bicycle pump into the cavity of the bird and pump until the bird is visibly enlarged.”  Then I hung the bird by it’s tail, as directed, in my basement overnight before cooking.  I still laugh when I use the book, as the pages listed in the Index are incorrect and it is hard to find the recipes, but it was only $3.00 and I loved it!!

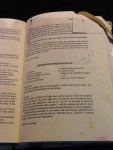
We have several family favorites over the years, and my now 35 year old daughter comes running if she hears I am making “Shrimp with Hoisin Sauce.”  As you can see from the picture of the earmarked page from the cookbook, I have made this many times and some of the sauces used have splashed onto the page.  This is the sign of a well loved recipe.  It’s easy and delicious.  I used to make it with white rice all the time, but as times have changed, I now serve it with the healthier brown rice…I especially like the short grain brown rice as it is crunchier.

Shrimp with Hoisin Sauce

5 scallions

1/4 cup hoisin sauce

1 Tbsp. dark soy sauce

1 Tbsp gin

1 1/2 pounds raw shrimp

3 Tbsp peanut oil

1/4 tsp salt

1 Tbsp. shredded ginger-root

1 tsp. minced garlic

Preparation

Chop the scallions into 1/2 inch lengths.  Combine the hoisin sauce, soy sauce and gin.  Shell and devein the shrimp.

Cooking

Heat a wok or skillet over high heat until a drop of water immediately sizzles into steam.  Maintain high heat throughout the cooking process.  Add the oil, salt, ginger-root and garlic.  Stir for 30 seconds or until the garlic becomes pungent.  Add the shrimp and stir-fry until the shrimp have turned pinkish and have curled together.

Add the scallions and stir to coat them well wit the oil.  Add the hoisin mixture.  Mix well to coat the shrimp with the sauce.  Cook for one minute longer.  remove to serving platter.

Mom’s (and mine) Eggplant Parmigiana

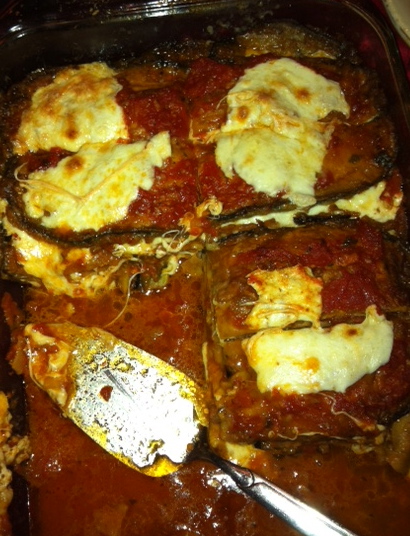
So I mentioned that I would help you use up that marinara sauce from last Sunday, and eggplant parmigiana is perfect for that.  Actually, anything parmigiana would do, such as chicken cutlet or veal cutlet.  But today it is “eggplant parm,” as we call it in New Jersey.

This truly is one of my favorite old time recipes.  I loved it as a child, and I love it still.  Growing up we were allowed to pick our favorite meal to be made on our birthday, and mine was always eggplant parmigiana with spaghetti on the side.  Funnily enough, it also became my daughter’s birthday meal.  My mom always prepared this dish with love every birthday, and the entire family would be so happy,  until several years ago, when she began to suffer from dementia and stopped cooking completely.  The first time it was my eggplant parm instead of hers was very sad for us all.  Thank goodness my sister, my daughter and I were smart enough to have made this recipe with her over and over, watching how she assembled all the ingredients, just so, in order to get the magnificent taste that was hers. If you have some family recipes that you want to carry on for generations, I strongly urge you to watch and learn from the woman whose memory (and recipe) you are trying to preserve.  When she is gone, you will bite into a piece of memorabilia each time you prepare it, that will warm your heart and soul.  Maybe even a tear will well up in your eye as you remember her and life as it was then, when things seemed so simple.

There are only four main ingredients in this dish, but it always tastes different, unique to the person who makes it.  How can this be possible? The best that I figure is that it is all in the particular way these four ingredients are handled.  The marinara sauce is definitely unique to the person who makes it.  Crazy as it may seem, the direction in which the eggplant is cut, and the thickness, has an effect on the taste.  Is the mozzarella sliced or shredded?  This also makes a difference.  And lastly, the amount of grated parmesan cheese greatly effects the sharpness of the dish.   As I said, it took several years of watching and fiddling with these ingredients to duplicate the taste of my mom’s.  I mastered it and want to share it with you now.

But before I give out the recipe, I must tell you about a shortcut that certainly helps now that life is so much busier for woman.  Even my mom started using this shortcut as she got older, as it lessons the work involved, but does not alter the taste one bit.  In recent years, some Italian delis/markets have started selling the eggplant slices, already fried.  If you buy this (not cheap), all you have to do is assemble the ingredients.  While I don’t always do this, it has changed this dish from a once a year treat, to a regular meal for company or family.  I have to resist making it too often, as I still want it to be a special birthday meal for my daughter.

                                                          EGGPLANT PARMIGIANA

2 large eggplants,  sliced crosswise into 1/4 inch slices
2  to 3 eggs, beaten
1 cup flour
2 eight ounce mozzarellas, sliced
grated parmesan cheese
3 cups (or so) marinara sauce

If you are going to fry the eggplant yourself, you will need to slice it and prepare to fry.  Every cook and cookbook around will tell you that you must put the sliced eggplant in a colander and sprinkle with salt.  They then say to leave it for 30 minutes or so, then rinse and pat dry.  I have never done this and neither has my mother.  So I just slice the eggplant, dip it into the flour (which I do add some salt and pepper to), then into the egg and then fry until golden brown.  You must drain it on paper towels.

When all the eggplant is fried….or you are back from the deli……it is time to assemble.

On the bottom of a 9 by 13 (or so) pyrex or roasting pan,  spoon plenty of that delicious marinara sauce, covering the bottom thinly.  Next, place a layer of eggplant, overlapping the slices slightly, to cover the sauce.  Now, more sauce, thinly spread on top of the eggplant.  Next place the mozzarella slices….definitely not overlapping…there should be some space between them..an inch or so at least.  Now a generous sprinkle of grated cheese, but do not overpower with this ingredient. Repeat the layers…eggplant, sauce, mozzarella, grated cheese until you have used up all the eggplant, ending with the grated cheese.

Cover with aluminum foil and place in a 350 degree oven for 30 minutes.  Take the foil off and cook for 15 minutes more.  Take out of oven and let it rest for 10 minutes before cutting.

This is spectacular when served with spaghetti (of course with the same marinara sauce) on the side.

Happy birthday!!

Have a “birthday meal” to share?  Would love to hear it.  Just post in Comments and we can all enjoy.

Mom’s Apple Crisp

Growing up in the 50s, you could always count on dessert each and every night, or at least that is how it was in our house and the houses of my friends.  Most nights, we would wait anxiously to see what homemade treat would come out of the kitchen after dinner.  Lots of dessert recipes circulated amongst my mom and her friends.  It is quite amazing that there were not many overweight children back then.  I am not sure exactly why that was so, but I was one of the few that was overweight, and I attribute it to the fact that I was not as physically active as most of the kids in the neighborhood, and portion control was not practiced in our household.

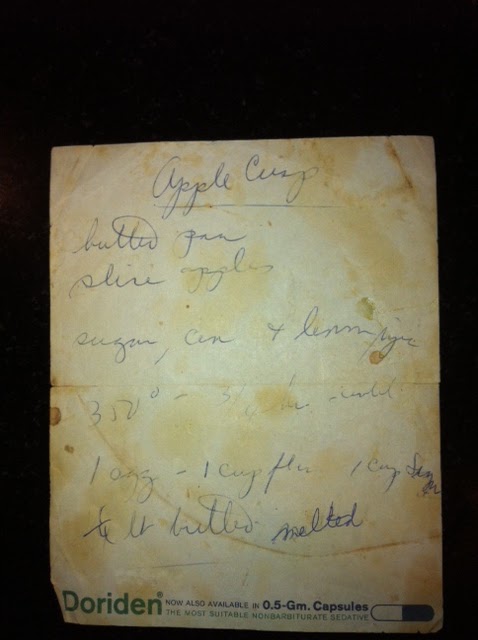
One of my favorite desserts was Apple Crisp (warm) and vanilla ice cream.  My mom does not remember who gave her this recipe, and oddly, there is no name on the original.  It is scribbled on a pad that advertises the drug Doriden.  If you look closely at the recipe, you will see this.  Doriden (Glutethimide) was a popular drug in the 50s, used to treat insomnia.  It must have been quite popular if my mom had a pad readily available in the kitchen to take down recipes.  Hmm… perhaps these 1950s housewives were swapping more than recipes in their kitchens.  Why couldn’t they sleep?  Weren’t they living the Donna Reed Show or Leave it to Beaver???

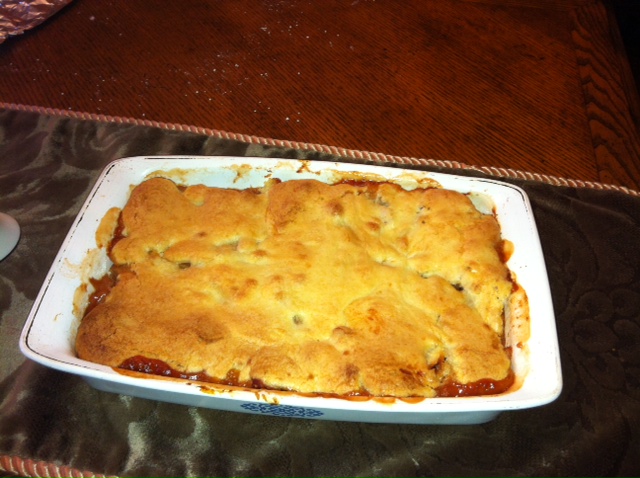
Anyway, this is another one of those recipes that comes out of the “dessert” folder every single year, after my first bite into a MacIntosh apple.   The smell of it baking in the kitchen brings me back to my childhood and the excitement of that nightly dessert.  And of course there is a pan story. The 9 by 13 inch Corning Ware baking dish that I still bake this in, was a gift to me from my Aunt Addie in 1974.  She knew that this was the perfect size for this recipe, and Corning Ware was a big favorite back then.  I think of her every time I butter the pan, and only use it for Apple Crisp.  This pan even moved to London with us in 1983.  When I made the Apple Crisp there, it brought me back home, if only for a short moment.

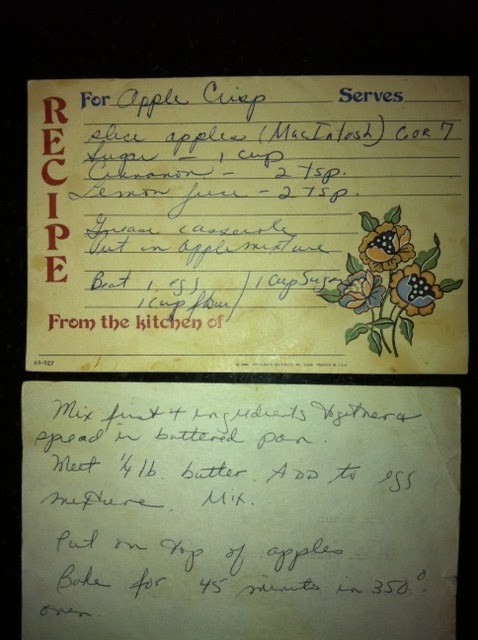
Yes, you can see that these recipes were used for over 50 years.  I experimented and finally re-wrote it with these measurements in 1984.  I hope you enjoy!!  And let me know what is the strangest thing you ever wrote a recipe on.

Mom’s Apple Crisp

6 or 7 large MacIntosh apples, thickly sliced
1 cup sugar
2 tsp cinnamon
2 tsp lemon juice

Mix above ingredients together gently then put into a buttered 9 by 13 inch baking pan.

Topping

1 egg, beaten
1 cup flour
1 cup sugar
1/4 pound butter, melted

Mix the above ingredients together.  Spread on top of apples.

Bake for 30 to 45 minutes in 350 degree oven until golden brown.

Marinara Sauce ( If it’s Sunday, it must be red sauce)

MARINARA SAUCE

If it’s Sunday, it must be red sauce….well at least if you’re Italian.  We don’t eat pasta with vegetables on Sundays.  This is a day for red sauce only.  I’m not sure how this came to be, but not having red sauce on your pasta on a Sunday would be equivalent to having a hamburger!  As a matter of fact, should we have a barbeque in the summer on a Sunday and serve hot dogs and hamburgers, there is always a pasta with a fresh tomato and basil served as well.  There is a joke that I love…”what is the an Italian barbeque?  You eat the baked ziti outside instead of inside.”  I am just amazed at how many red sauces there actually are.  Also, just putting the same sauce on a different pasta shape, can taste entirely different.  We usually have a meat and salad to follow the pasta, but for some reason we only do this on Sundays.  I believe that comes from the tradition of having meat sauce on Sundays.  During the week, pasta and a salad is just fine.

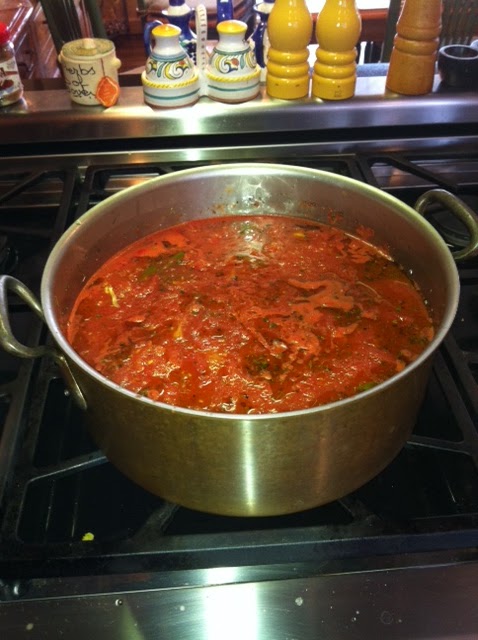
So today I am going to share my mother’s version of “marinara sauce” with you.  There are many variations on this sauce.  My husband makes a delicious one, but it is not my mother’s.  Once again, the pot used for cooking the sauce is very important, at least for me.  It is the only way I can get the exact flavor.  My Aunt Gerry, my mother’s sister, gave me a classic 1970’s Dutch Oven for my birthday right before I was married, as she knew that was THE pot to use. I used that pot to create a perfect replica for 30 years before throwing it out.  That was a very sad day for me.  I actually passed this pot around to my dearest friends who wanted to replicate my sauce. It took some time to find a replacement pot that would create the same taste, but I finally found a copper pot that is as close as it gets.  I am satisfied with this.

If you look at this old, tomato stained recipe, you can see that there really is very little instruction.  My mother made her sauce from memory, as did her mother, and I do the same.  When I made this sauce today (it is Sunday), I measured everything so I could give you the exact amounts.  I also made a rather large pot because I will be saving the sauce and using it for eggplant parmesan later in the week…and I will share that recipe and story with you then.  This sauce also freezes beautifully, so if you are going to make it, you might as well make enough to use again.

If you have a “red sauce” recipe to share, I would love it if you would place it in the comments section.  There are 52 Sundays a year!

Recipe for Marinara Sauce

3 to 4 cloves of garlic, sliced, not too thinly.
1/2 to 3/4 cups of extra virgin olive oil
Sautee this for a few minutes but do NOT brown the garlic.  Shut off the flame before this happens.
Keep the flame off until you add the rest of the ingredients.
4 28 ounce cans of San Marzano Italian peeled tomatoes, squished in your hands*
1 tbsp. salt
1 tsp. pepper
2 tsp. of dried oregano
Bring back to a mild boil, then lower and simmer for at least one hour, stirring occasionally.
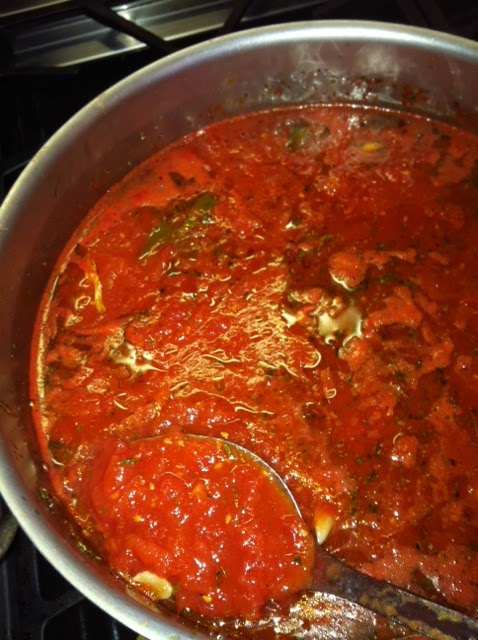
* San Marzano tomatoes from Italy (and it must say “Product of Italy” on the can) are the best.  Not only do they taste the best and squish the best, but Dr. Oz says they are one of the top anti-cancer foods around.  He says they must be from Italy as well.  I don’t know why, but “squishing” is a key factor in the taste of this sauce.  In the close-up photo you can see what consistency I am talking about.
Also, don’t judge the amounts of the ingredients until you let the sauce cook for the recommended time.  The oregano will melt into the sauce for flavoring and the oil seems to disappear.

Mom’s Chicken Soup

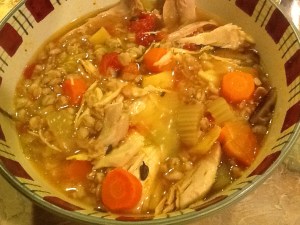
soupWhen you had a cold growing up in our house, you could bet that mom’s chicken soup was in your future.  Only when someone was sick would this soup appear on the stove, and now, all these years later, we are finding out that there really are medicinal benefits in chicken soup for curing the common cold.  Throughout the sixties, I can remember pots of this being delivered to whoever had a cold in the neighborhood.  It seemed that all winter long there was always a pot of this delicious soup cooking on the stove in our kitchen.  While it was not my favorite then (remember…I was always sick when I ate this), I have come to love this on a cold winters night as well as when my sinuses are stuffed and I feel achy.  I have made some basic changes to her recipe over the years, but honestly, I just added an ingredient or two.  This is homemade chicken soup in its basic form, with a variation of the times. When my family smells this cooking, I can see their sinuses clear and their hearts warm.

Mom’s Chicken Soup

One 3 to 4 pound chicken…nowadays we like organic, free range, if possible
2 leeks, white part chopped
3 – 4 carrots, cut into 1 inch pieces
2 stalks of celery, cut into 1 inch pieces
2 small onions, quartered
2 parsnips, cut into 1 inch pieces
5 to 6 Italian plum tomatoes, squished or chopped
fresh or dried oregano and thyme, to taste
1 TBSP of turmeric ( this is my addition…they did not know from turmeric in the 1960s).
salt and pepper to taste…..I can tell you that I add at least 2 TBSP of Kosher salt
5 quarts of water, approximately

I put all the above in a large pot and bring to a boil.  Then I simmer on low for about 2 hours.  I then take the chicken out of the soup, and take all the meat off the bone and then put just the meat back into the broth.

While the soup is cooking as above, I boil some faro separately, which I will add to the soup when it is done.  Farro is a grain that is nuttier and crunchier than brown rice.  Cook as directed until crunchy.  Then add as much as desired to the soup before serving.  You can now buy faro in most food stores, but if you cannot find it, certainly brown rice will do.  I also love an egg noodle or a tiny bow or ditalini pasta.  Use whatever you like, but I highly recommend the farro.

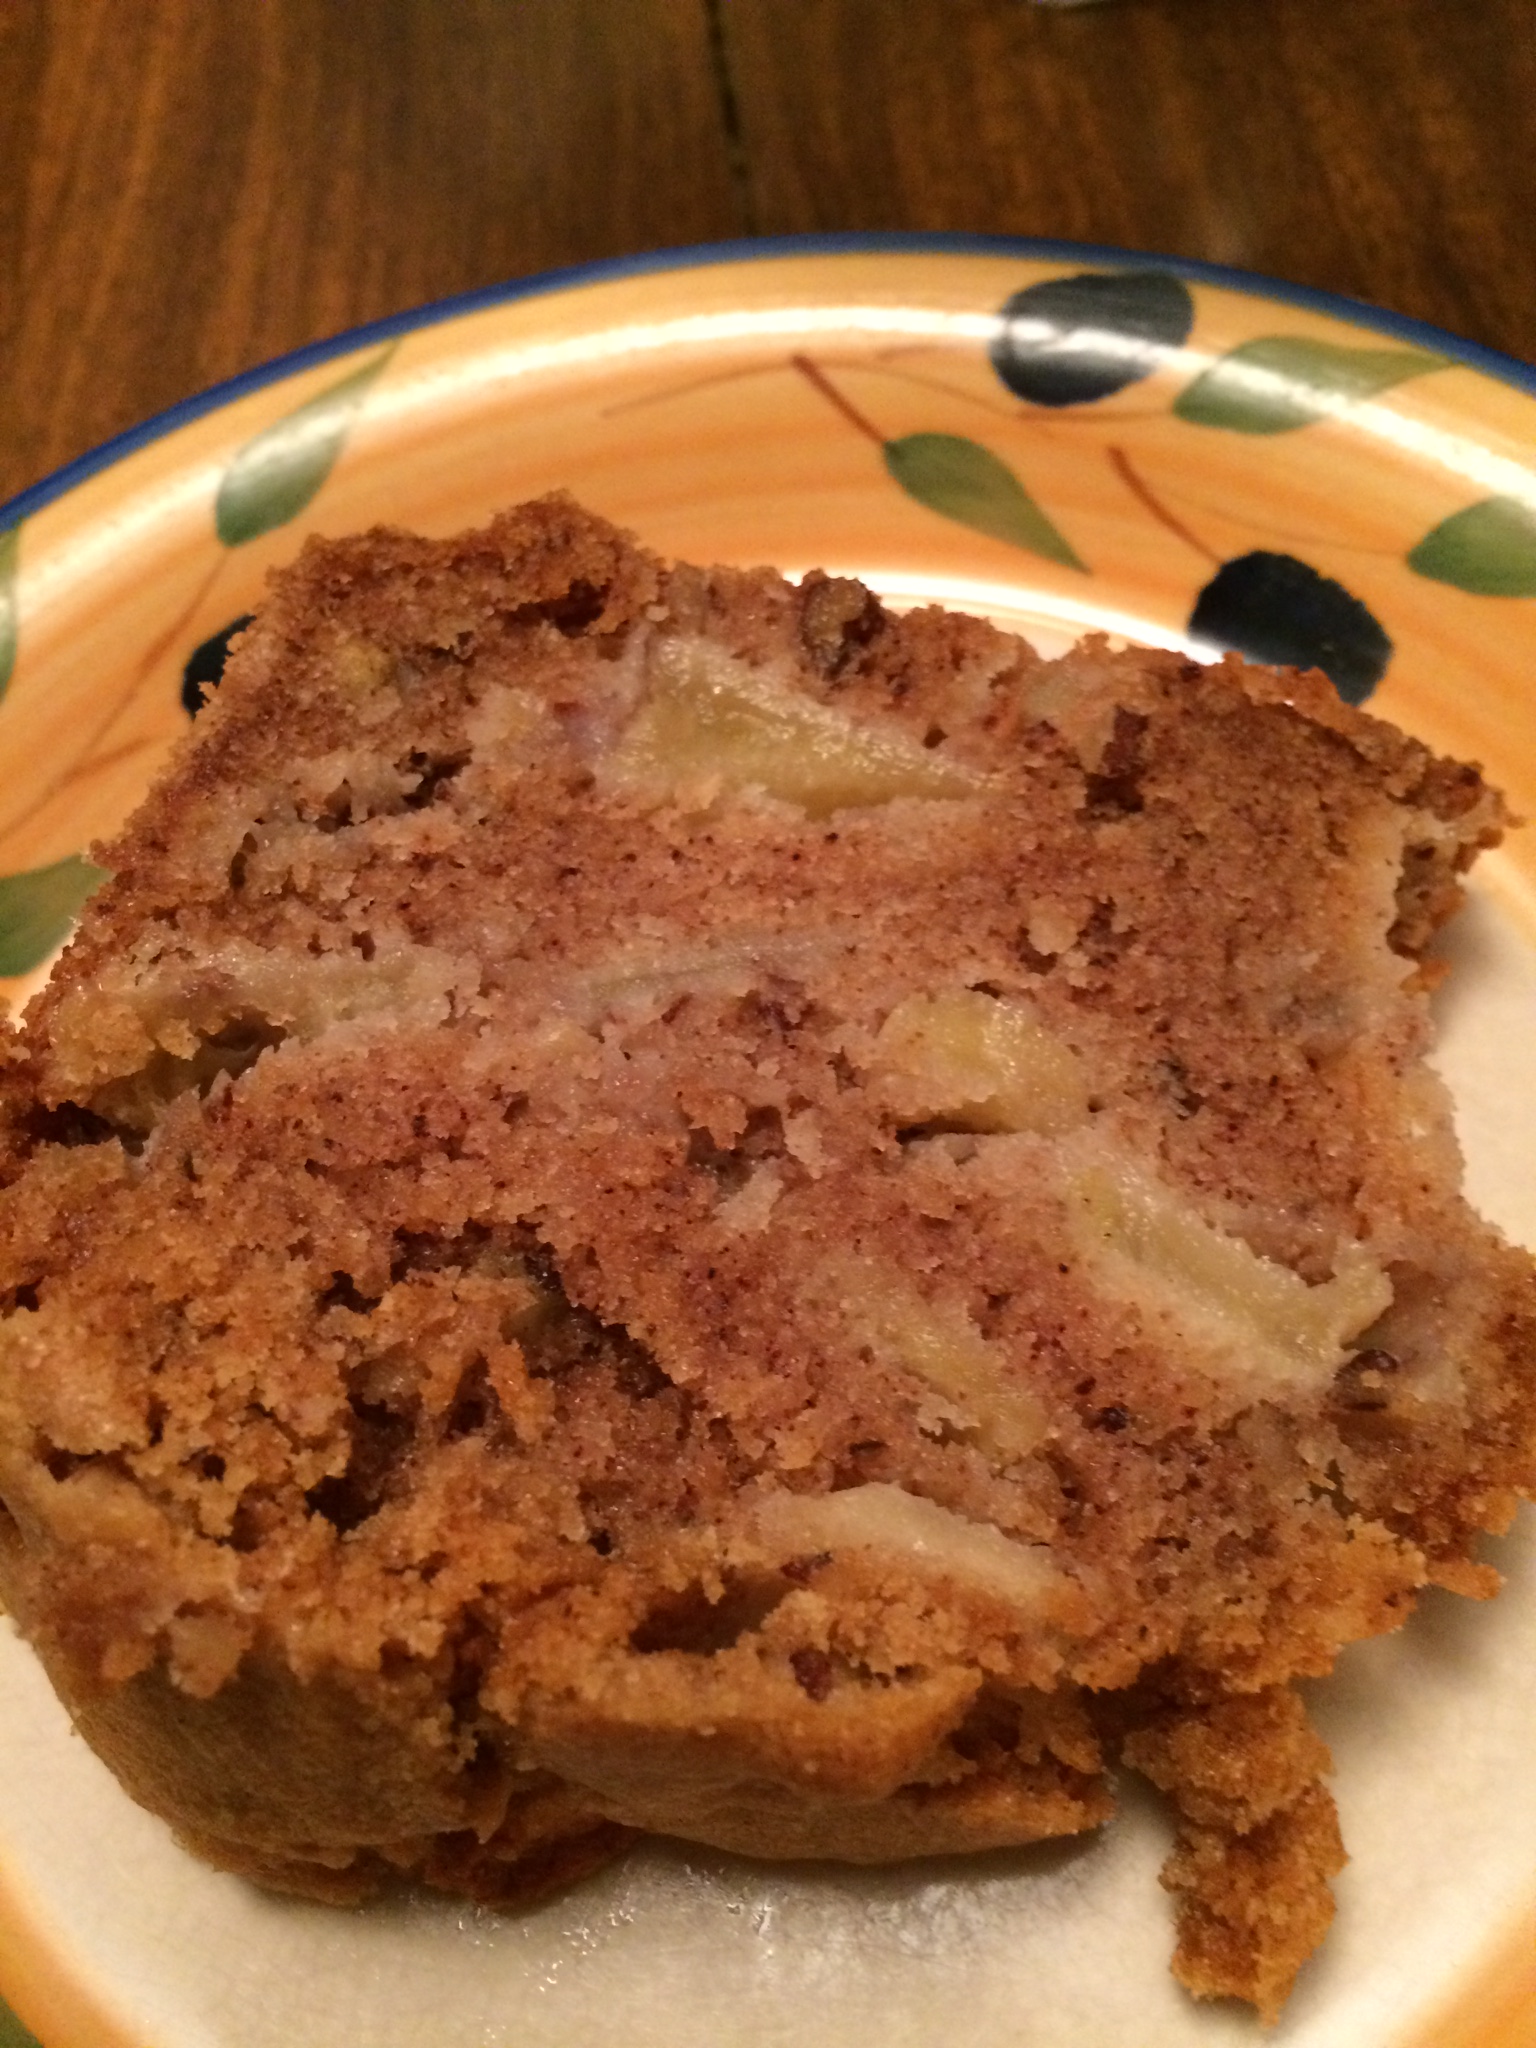
1973 New York Times’ Teddy’s Apple Cake

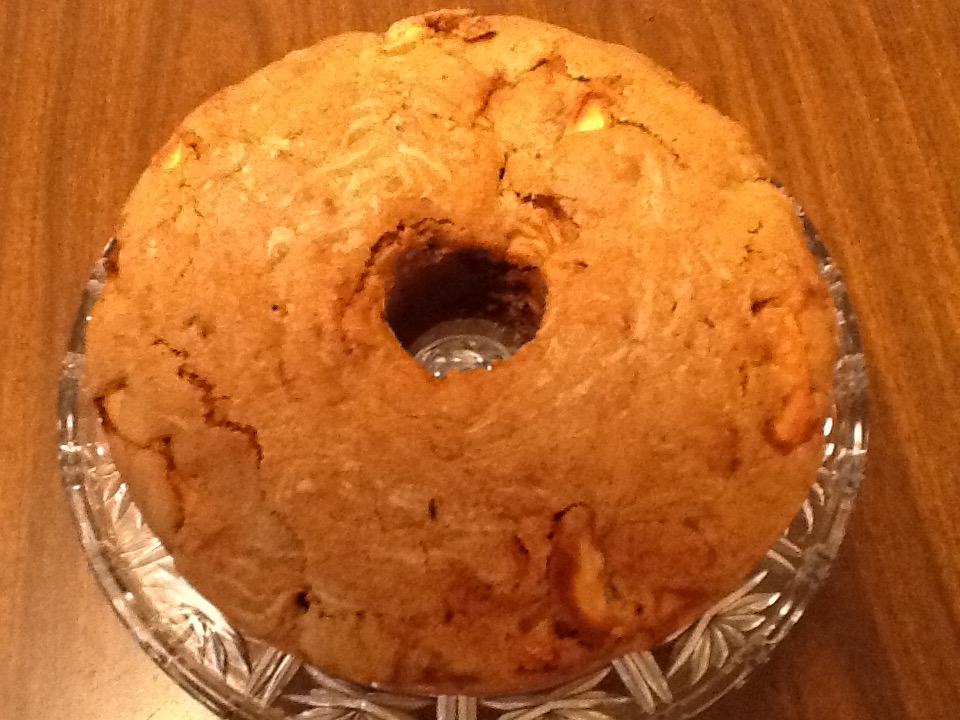
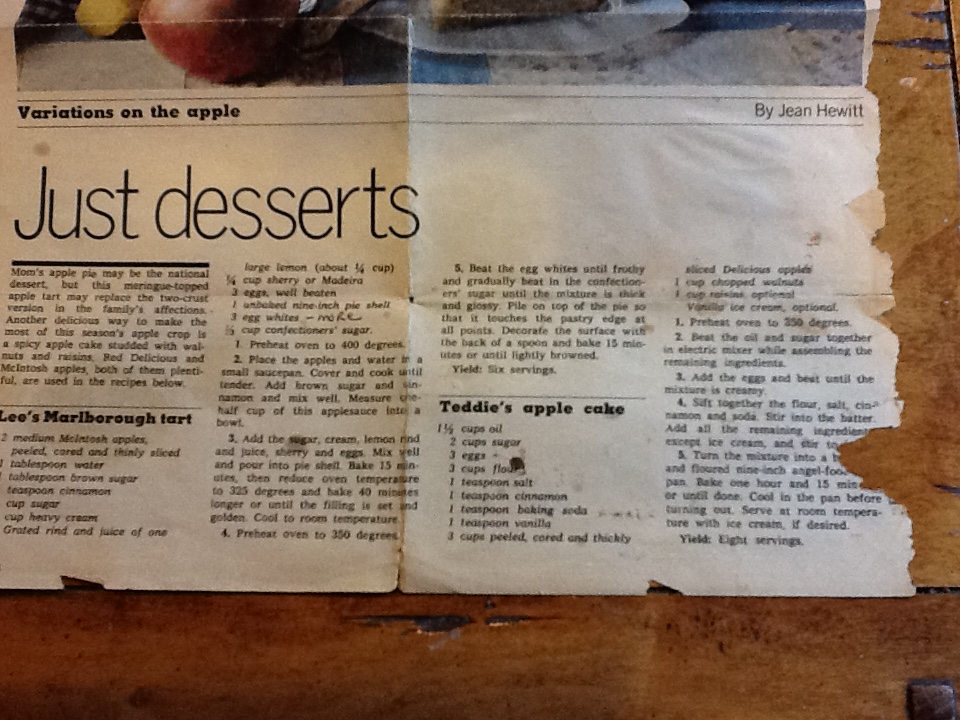
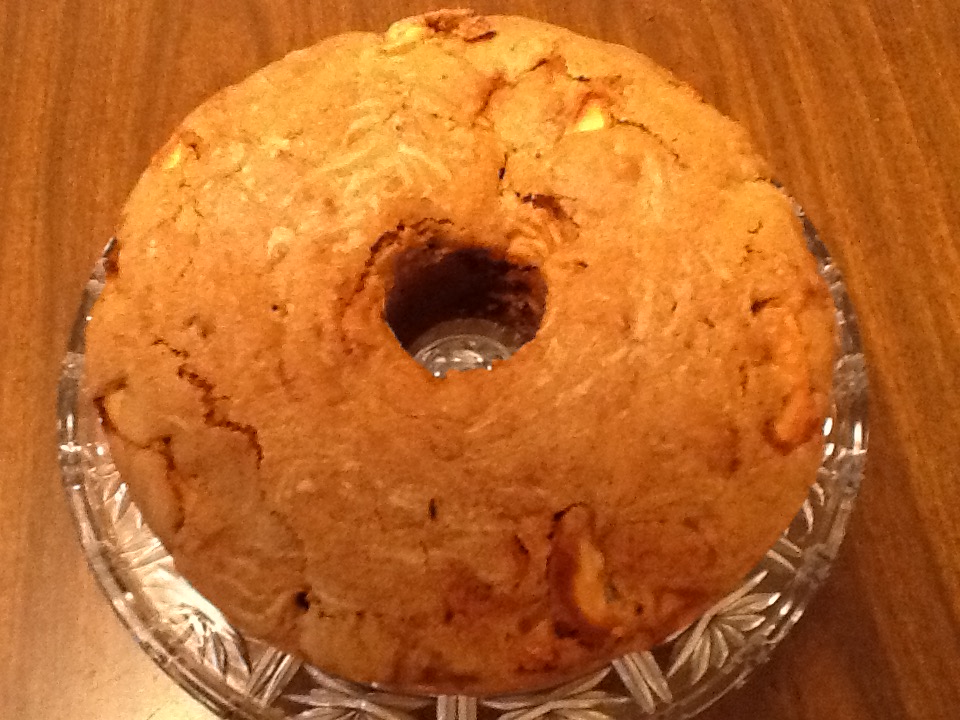
apple cake platedToday I would like jump ahead to 1973.  This was the year I got married….for the first time.  I also graduated from college this year, just two months before I got married.  While I was very eager to begin a career in teaching  (this was the career of choice, at this time, for a woman who was going to help put her husband through graduate school), I was even more anxious to have a kitchen of my own.  I would be home every day by 4:00 o’clock, and I could start cooking all the recipes I had collected from my grandmother, mother and aunts.  I began my cookbook collection with ” Betty Crocker’s Dinner for Two,” Better Homes and Gardens Recipes for Entertaining,” and of course, “Joy of Cooking.”  I bought countless magazines that contained recipes just waiting for me to try.  I would rip out the pages of luscious dishes and started keeping labeled folders with such names as “desserts,” “chicken,” “appetizers,” etc.  I lined all the cabinets in my small but cozy kitchen with red contact paper and arranged all the pots and pans in size order.  I began a pantry full of cooking staples and spices….even ones I’d never heard of.  I could not wait to get started cooking! We would invite fellow grad students over for dinner, and we still laugh about the disasters that I whipped up in that kitchen.  But somehow, I managed to muster up the audacity to try a recipe from The New York Times Sunday Magazine on September 30, 1973.  It was such a success that I have consistently pleased my family and friends with “Teddy’s Apple Cake” for 40 years.  When autumn arrives, out comes the original copy of this recipe that I tore out of the magazine all those years ago.  Just looking at the worn page from The Times takes me back to that tiny kitchen in Philadelphia and how proud I was of this accomplishment.  I see myself as a young bride, so happy to be beginning my new  life….my life in the kitchen, expressing my love through the magic of food.

TEDDY’S APPLE CAKE

1 1/2 cups oil
2 cups sugar
3 eggs
3 cups flour
1 teaspoon salt
1 teaspoon cinnamon
1 teaspoon baking soda
1 teaspoon vanilla
3 cups peeled, cored and thickly sliced Delicious apples
1 cup chopped walnuts
1 cups raisons, optional ( I never add them)
Vanilla ice cream, optional or homemade whipped cream is also good as a topping

1.  Preheat oven  to 350 degrees
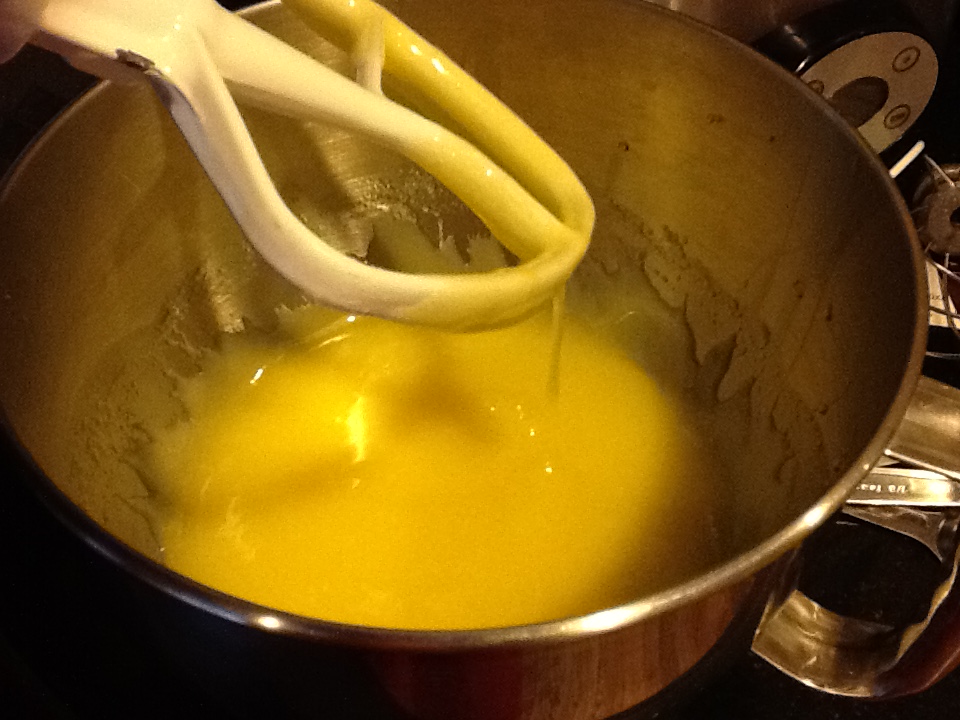
2.  Beat the oil and sugar together in electric mixer while assembling the remaining ingredients.
3.  Add the eggs and beat until the mixture is creamy.
4.  Sift together the flour, salt, cinnamon and baking soda.  Stir into the batter. Add all the remaing ingredients, except the ice cream and/or cream, and stir until combined.
5.  Turn the mixture in a bundt or angel food  pan, greased and floured.  Bake for one hour and 15 minutes or until done.  Cool in the pan before turning out.  Serve at room temperature with ice cream or whipped cream, if desired

Yield:  eight servings

apple cake recipeapple cake applesapple cake creameryapple cake batterapple cake battr closeupapple cake batter:panapple cake baked:panapple cake platedapple cake slice

Little Nonni’s Baked Spaghetti

finished product

finished product

Little Nonni’s Baked Spaghetti

My grandmother on my paternal side left her native country of Italy to come to the USA with her husband and three small children.  She left her sisters and all her relatives in a small town in Puglia, Santeremo en Colle, and settled in Jersey City, New Jersey.  In the 80+ years that she lived in the USA, she never learned a word of English. Her food, however, had a language all to itself, and we knew how much she loved us, not through words, but through her cooking.

She did not like to give up her recipes, not even to her daughter and especially not to her daughter-in-laws.  The way my sister and I learned how to make the dishes that we loved was to just sit quietly in her kitchen and watch.  We were certain that she would turn her back so we couldn’t see what secret ingredient she was throwing into the pot.  Without that special ingredient, whatever it might be, nothing ever tasted like hers..  There was indeed “something” missing, and this made her very happy.  We were in her kitchen in Jersey City every Sunday in the fifties, and we continued to watch her every move, and  as we got older,one of us could distract her while the other on memorized exactly what was going into the dish.  We were so determined to get this recipe to taste just like hers, that my sister took the pan from Nonni once she had stopped cooking.  We felt that this banged up pan, that traveled many miles on holidays and special Sundays to bring this dish to our house or the houses of our cousins, was instrumental in achieving this taste from our childhood.  We now share the pan.  It travels back and forth from New York City to New Jersey several times a year as we continue this traditional meal for our families and friends.  When I make it for my father, who is 92 years old, I can see him drift away in sweet memories of his childhood and his mother.

The Recipe

This recipe is actually three recipes in one since you need to make a heavy meat sauce (ragu) and you need to make tiny meatballs.  I will include these two recipes as well.  It has taken us years to get it all to taste like hers, but we are very close. We took our mom’s recipes for meat sauce and meatballs and watched diligently for those “secret ingredients” of little Nonni’s.

Nonni’s Ragu

4 cans of Italian plum tomatoes, 28 ounce cans…..make sure the can says “Product of Italy”.
1  6ounce can of tomato paste
1 onion, chopped
1 to 2 pounds of pork spare ribs
1 to 2 pounds of beef ribs or any beef on the bone
1 pound of Italian pork sausage
1/2 cup good olive oil or lard…of course, Nonni used lard and I will sometimes use this or one part olive oil / one part lard
1 1/2 cups of red wine
salt and pepper to taste

In a large, heavy pot heat the oil and /or lard over medium heat.  When oil is warm, add the various meats in batches and brown, turning occasionally until brown on all sides.  Remove meat as it browns and continue adding until all the meat is browned well and out of the pot.  Now add the chopped onions and sauté for 5 minutes or so.  Add the wine and then stir and turn off the heat.  Now add the tomatoes, which have be “squished” in your hands until basically you have pureed tomatoes.  If you prefer, you can pulse them once or twice in a blender instead, but little Nonni would never have done that!  Turn the heat back up to medium and cook for thirty minutes.  Then add the tomato paste. Clean out the can of paste by swishing a little water around in the can and add it into the pot, stirring to mix the paste in well.  Add salt and pepper to taste. Cook on low for one hour, stirring occasionally.  Then put the meat back in the pot and cook for another hour, at least.  the longer the better.  Make sure you stir occasionally so that nothing sticks to the bottom.

While this is cooking, make the tiny meatballs.

Nonni’s Tiny Meatballs

1/2 pound each of ground beef, veal and pork
1 1/2 cups of Italian style breadcrumbs
3 eggs, beaten
3/4 cup grated Pecorino Romano cheese
3 garlic cloves, finely minced
1/2 cup fresh, Italian flat parsley, minced
salt and pepper

1/4 cup olive oil for frying meatballs in a skillet

Combine all ingredients, except the olive oil, in a large mixing bowl.  Using your hands, mix thoroughly. Really get in there.   If consistency is too wet, just add more breadcrumbs.

Once they are the right consistency, wash your hands, but leave them slightly wet for rolling the tiny balls.  They should be the size of grapes.  I place them in a cookie sheet as I go along and then fry all at one time.  She always used a cast iron heavy skillet to fry the meatballs and so do I.  But any skillet will do just fine.  Heat the oil.  Add several meatballs at a time, but keep an eye not to burn.  Keep turning until they are nicely browned.  I line another cookie sheet with paper towels and this is where I put the meatballs to drain as they come out of the pot.  This will get rid of the excess oil.

Okay then.  Now it is time for the baked spaghetti!

Along with the ragu and the meatballs, you will need the following:

3 pounds spaghetti, cook very al dente
2 fresh mozzarella, about one pound each, cut in 1 1/2 inch cubes…roughly cut
1/4 pound sliced prociutto, cut into short strips about 2 inches wide…roughly cut
1/4 cup or less grated Pecorino romano

And of course, THE pan.  Since this coveted pan is presently in New Jersey,i am happy to suggest other options.  I think an oval roasting pan is the best option since once assembled, this is very deep.  It needs a deep pan, so any pan with high sides would do.

The Assembly:

1.  Heat the oven to 500 degrees, then lower to 450.
2.  Once the spaghetti is cooked very al dente, drain it and put it in a bowl and mix it with the oiliest part of the ragu
3.  Butter (or use lard or Crisco)  the entire pan…especially up the side.  Then coat with breadcrumbs.
4.  Then layer:
Spaghett
Mozzarella and prociutto  (sort of stick it into the spaghetti, don’t just lay on top)
Meatballs
Ragu…not a lot
a little Romano cheese
Continue layering in this manner, until you have reached the top of your pan.
5.  Cover and cook for 30 minutes.  Then take cover off and cut into portion size pieces.  Put back in the oven, uncovered, for another 15 minutes.  The sides and top will get crispy.  Not to worry.  This is what they end up fighting for.  Once it is out of the oven, let it settle for 15 minutes.

Pass that delicious ragu, and some of your big eaters may have room for the ragu meat.

I hope you enjoy this dish.  Yes.  It is a bit of a cooking marathon, but you can make the ragu and meatballs in advance.

I can smell and taste it right now.  I am salivating.  And I can see my grandmother’s smile as we all enjoyed each morsel.   I hope your family and friends will feel the love that goes into this dish.  THAT is the “secret ingredient!”