Sandy’s Pear Custard Squares

pear tart plated

You know how there are some desserts that after just one bite, you know you must have the recipe? Well this pear tart is that dessert. A friend brought this to a dinner party, and after one bite, I asked her for the recipe. She said she was happy to write it up for me. I was already planning when I would make this, and who would be the lucky ones to share in this delicious dessert.

Receiving her handwritten recipe (I always love the handwritten ones), made me very happy.   It brought me back in time to my index box full of handwritten recipe cards. My first little yellow box had dividers, such as poultry, fish, meat, desserts, appetizers, etc.   I cherished each handwritten 3 by 5 card. I still do. But this handwritten recipe had an extra special twist. She had painted a beautiful still life in watercolors of pears on the front of the card! This might just be the most beautiful recipe card I have ever received.

I was very careful while preparing this, as I wanted to make sure the painting didn’t get stained with ingredients. I tend to be a messy baker. Now that I have this posted, I plan to frame this picture and put it in my kitchen.

If you’re looking for an easy, crowd pleasing dessert, you must give this a try!

Recipe:

Crust

1/2 cup butter

1/3 cup sugar

3/4 cup flour

1/4 tsp. vanilla

2/3 cup chopped macadamia nuts

Filling/Topping

1 8 ounce pkg. cream cheese

1/2 cup sugar

1 egg

1/2 tsp. vanilla

3 pears, sliced 1/8 inch thick

1/2 tsp. sugar

1/2 tsp. cinnamon

  1.  To make curst, cream butter and sugar.  Beat in flour and vanilla.  Stir in nuts.  Press into greased 8 inch square pan.
  2. Bake in 350 degree oven for about 20 minutes or until lightly browned.
  3. Cool.
  4. Meanwhile in mixing bowl, beat cream cheese until smooth.  Add sugar, egg, vanilla until combined.
  5. Pour over cooled crust.  Arrange pear slices over filling.
  6. Combine the 1/2 tsp sugar and cinnamon and sprinkle over pears.
  7. Bake 28 to 30 minutes (center will be soft set and will become firmer upon cooling).
  8. Cool 45 minutes.  Then cover and refrigerate for at least 2 hours before cutting.

*Recipe can be doubled

pear tart picturepear tart recipepear tart ingredientspear tart macadamiaspear tart pearspear tart crustpear tart crust bakedpear tart pan 1pear tart pan 2pear tart pan 3pear tart close uppear tart plated


Island Rum Punch

rum punch glass**?

Please bear with me for just one more cocktail recipe.  I must share this with you!  Who knew that having no kitchen for a few weeks would turn me into a “mixologist”?  Well, not really.  I’m just following recipes, but it gives me the same satisfaction that I get after creating a delicious dish…only with an extra “kick,” if you get my gist.

I love the way this recipe for rum punch came to me.  I was in my writer’s workshop class, and my classmate began to read her piece on St. Kitts island and her family’s rum business, Brinley Gold Shipwreck Rum.  I was immediately carried away by the beauty of her description of what sounds like an absolutely magical island.  I was mentally making plans to visit this paradise, as it sounded irresistible.  Then, in the middle of her piece, she included a recipe for Leeland’s rum punch, and gave us each a glass of this nectar from the St. Kitts gods.   One sip and I had to have the recipe.  We all asked her to repeat the recipe , and I furiously wrote it down.  I knew right there and then that I was headed to the liquor store after class to buy the necessary ingredients for my dinner guests that evening.  They would love this!  Well, actually this was a bit off a gamble as no one was a rum drinker.  But neither was I until I was introduced to this brand of rum, and the creative recipes provided by the owners on their website.  I’ve converted many a “non-rum drinker” this summer, so this punch would certainly do the trick for this crew.  I was certain of it.

It was a perfect night for this indoctrination.  The sun was out, and there was a delightfully cool breeze, so sitting on the deck made it feel like you were on vacation.  I had the pitchers of punch chilling in my (new and shiny) refrigerator (I had just polished it).  Everyone was game for “just one drink.”  They looked skeptically at the pitcher, but only I knew what would transform this pitcher of what looked like plain fruit juice, into something so heavenly that they wouldn’t have just one drink.  What is that special ingredient?  Freshly grated nutmeg, atop each individual drink, is the key to this delicious, tropical libation.

Everyone loved it.  Everyone had one more. Everyone wanted to know when I would start using my ovens.  I told them “next week for sure.”  Cheers!

Recipe:  makes a lot

2 cups Shipwreck White Rum  (1/2 bottle)

1 cup Shipwreck Coconut Rum (1/4 bottle)

1 cup fresh lime juice

4 cups orange juice (I used less….maybe 3 1/2)

4 dashes of bitters

freshly grated nutmeg ( on each glass)

Combine all the ingredients except the nutmeg in a large pitcher and keep chilled in the refrigerator.  Serve over ice.  Grate fresh nutmeg on top of each individual glass.

rum punch recipe 2rum punch bottlesrum punch ingredientsrum unch pitcherrum punch nutmegrum punch glass**?


Halibut Baked with Mushrooms

halibut plated **

Finally…..I have my kitchen back! It looks beautiful. I’m absolutely in love with my appliances. However, I need a PhD in “Appliance Use and Cleaning.”   Seriously, I have about 4 hours of tedious reading to do before I will feel comfortable using them. Instead of cooking, I seem to be busy polishing away every fingerprint that might mar their beauty. I find myself gazing fondly at them, and then I spot a mark on the gleaming stainless, and out comes the “recommended polish, and chamois cloth”! I’ve got to gain some control, and start cooking again.

I’m now using the range top. I haven’t figured out which burner is high speed and which is the lowest “special” simmer, as I was told in the showroom, but that’s not so important. I’ve never been such a careful cook. I don’t want anything to spill over and stain the burners or grates. I use a “recommended polish and soft cloth” after every use, and make sure it’s sparkling before I leave the kitchen. I’ll check back later to make sure there are no streaks.  I don’t know what’s come over me!

I just can’t bring myself to use the ovens. One is a steam/convection oven and I have no idea how to use it yet (the manual is enormous!). The other is just too gorgeous to get dirty. To deal with this dilemma, (and some hungry people who are sick of grilled food), I’ve decided to use my outdoor gas grill as an oven until I’ve gotten over this love affair with my new ovens. Plus, it’s summertime, and why not cook outside as much as possible? This is what I tell myself…and anyone who might ask!

I decided to try a new recipe, so no one would complain that it didn’t taste as good as perhaps the last time I made it. I had been holding on to a recipe for “halibut baked with mushrooms” for sometime now, and it looked like it would fare well baked in a pan on the grill. My sister loved this recipe from Lidia Bastianich, and gave it to me ages ago, telling me I must try it. Neither Lidia, nor my sister, is ever wrong about a recipe, so I was excited to try it. I made a few changes to accommodate the fact that I would not be baking it in an indoor oven.

It was indeed delicious, and a big hit. I can tell that this is a recipe I’ll be making over and over. And yes, eventually I’ll be baking it in my new oven.   Just not yet!

Oh dear, I see a spot on the fridge…..gotta run……where did I leave that polish??????


Recipe:  serves 6

1 lb. assorted mushrooms of choice, sliced

7 tablespoons of extra-virgin olive oil

3 medium onions, thinly sliced

6 garlic cloves, peeled and crushed

1 teaspoon kosher salt

6 halibut filets, about 2 1/4 pounds in total

Juice of one lemon

1/2 cup dry white wine

2 tablespoons chopped fresh parsley ( I forgot this somehow….maybe I got distracted by a fingerprint)

  1.  Preheat oven (no!!!) or gas grill to 400 degrees.
  2. In a large skillet, heat 3 tablespoons of the oil over medium heat, and add the onions and garlic.  Cook until wilted, about 5 minutes.
  3. Spread the onions and garlic on an oiled sheet pan.
  4. In the same skillet, over medium high heat, heat 2 tablespoons of oil and then add the sliced mushrooms.  Drizzle with a little bit of water, and cook until softened and browned, about 5 minutes.
  5. Spread about 2/3 of the mushrooms on top of the onions on the sheet pan, and season with 1/2 tsp of salt.
  6. Season the halibut with half the lemon juice, the remaining 1/2 teaspoon of salt, and the remaining 2 tablespoons of oil.  Pour the remaining juice and the white wine over the vegetables and sprinkle with parsley.
  7. Set the halibut on top, and top each filet with the remaining mushrooms.
  8. Bake until cooked through, about 20 minutes.

halibut ingredientshalibut winehalibut onions 2halibut mushrooms 2halibut mushrooms 3halibut pan 1halibut pan 2halibut pan 3halibut grill 1

halibut grill 3halibut plated ?halibut plated **


Vodka Cucumber Smash

vodka smash

Still no kitchen! So what am I cooking tonight? Vodka Cucumber Smash.

There’s not much back story to this recipe, and frankly, at this point, who needs a story??!! I need my kitchen back. With my kitchen in turmoil, I’m like a fish out of water. I know it won’t be too much longer, but in the meantime, I’ll spend my time collecting (and making) recipes for cocktails. I have to admit, this has been fun!

I first had this cocktail, “Vodka Cucumber Smash,” at Tommy Bahamas Restaurant, in St. Armands, Circle, near Sarasota, Florida. It was so refreshing, and I’m a cucumber lover, so I was instantly in love. The bartender was nice enough to show me how to make it, while he was making me my second one.

Of course, the key to just about any drink is to use your favorite brand of alcohol.   I know that most of you have a favorite brand of vodka, but I’m going to recommend my new favorite…”Fair Quinoa Vodka.” Yes, quinoa. It’s really delicious. And could it be healthy??? Probably not, but if you are gluten intolerant, this is a good choice since most other vodkas are made from wheat.   Even if you aren’t gluten intolerant, it’s a delicious vodka. “Fair” is not easy to find, but I get it at “UnWined Boutique” in Millburn, New Jersey. As a matter of fact, this is a great little wine/spirits store, where you’ll find many uncommon wines and alcohol from boutique vineyards and distilleries. This is where I found  “Fair Quinoa Vodka,” and I’ve been a fan ever since.  It’s a great store to visit. Check out UnWined Boutique at www.unwined-boutique.com.   You just might find something as unique as quinoa vodka.

Cheers and Happy Forth of July!

Recipe:

2 ounces vodka

1 ounce St. Germain

juice of 1 lime

4 or 4 slices of peeled cucumber

splash of sparkling water, if you like

1  Peel and slice the cucumber, putting 3 or 4 slices into a glass, reserving one slice for garnish.

2.  Squeeze the limes into the glass with the cucumber.  Muddle (which really just means smash).

3.  Add ice cubes to the glass, then the vodka and St. Germain.  Stir well.

5.  Garnish with lime and cucumber.  Add a splash of sparkling water, if you like.

*Note:  You can make this in a shaker.  Shake it well and then pour into a glass and garnish.

**Note:  If you want this a little sweeter, you can always add a little sugar when you are muddling.

vodka smash ingredientsvodka smash muddlevodka smash muddle 2vodka smash 2vodka smash


Brinley’s Summertime Rum Drink


rum glass closeup fixedWhere have I been?   Well, honestly, I’ve been right here. I’ve just been without an oven, and most of my kitchen appliances have, one by one, stopped working. You can just imagine how frustrated I’ve been. Even the outdoor grill has been on it’s last leg, so I couldn’t do much cooking there. Now the next two weeks, I’ll be without a kitchen all together, as these all need to be replaced, which of course led to a larger project.

What to do? Drink! YES!

I’ve been very interested lately in all these fancy drink menus at bars and restaurants. Some of them look as complicated as a fancy French recipe might be. They are a little bit daunting to me. But as luck would have it, a wonderful rum drink recipe, just perfect for summertime, was given to me in a most usual place.

Every Tuesday morning, you can find me, and several other fellow writers, gathered around a table, at a writer’s workshop. We go around the table, sharing our work, one at a time, and giving each other feedback.   A fellow writer has been sharing her story about how her family started a rum business in St. Kitts. The story is absolutely fascinating, and she always pulls a bottle of their rum out of her bag, and we share a taste as she reads. It really sets the mood for her tale….or so we tell ourselves, as we sip away on these delicious flavored rums at 11:00 in the morning! This is my kind of writing class!!

Along with the sipping, Mary Ann usually shares a recipe or two for some fabulous rum drinks, which you can find on their website, www.brinleygoldshipwreck.com.   However, the one that I’m in love with right now is not on the website, and I think it’s a perfect drink for a lazy, summer afternoon. Let me warn you. They go down easy. My trick is to add a little sparkling water or seltzer to my second (or maybe third), and reduce the rum amount.

For the remainder of my time without a kitchen, I’ll be trying out the recipes on their website, one by one. Life’s really not that bad without a kitchen. It’s opened up a whole new world or recipes to me, and I’m happy. Who wouldn’t be?!

Salute!

RECIPE:  makes 1 drink  (don’t kid yourself, you’ll have more than 1)

Brinley Gold Shipwreck Mango Rum ( 1 1/2 ounces)

1/2 cup ruby red grapefruit juice

plenty of ice

fresh mint leaves

Fill a shaker with ice.  Add the rum and the ruby red grapefruit juice.  Shake vigorously.  Pour the contents of the shaker into a glass.  Add the mint.

  •  When you make your second drink ( and you will), add a little club soda or sparkling water to the shaker as well.
  • For a party, you can make pitcher of this in advance (minus the ice because you don’t want it to melt).  Then just shake them up one at a time, or simply pour over ice.  Don’t forget the mint.  It makes a difference.

rum full bottlerum labelrum ingredientsrum glass fixed 1rum glass toprum glass closeup fixed


Dandelions, Tomatoes & Beans (Oh My!)

dandelions pan 4 **?

“Eat your vegetables!” is every parent’s mantra. We know their nutritional value and want to make sure that our children and grandchildren reap all the benefits of a highly nutritious diet.   However, it has always been my experience that vegetables need to be disguised in some delicious sauce, because boiled with a pat of butter, never was a hit in my family. Luckily, growing up in an Italian family, boiled with a pat of butter, was rarely the case. Vegetables were always flavorful, sauteed in olive oil with garlic, or maybe onion and prosciutto, or with a few tomatoes thrown in for good measure. Or better yet, tossed with pasta. Many times, beans, such as cannellini or chick beans, were tossed with a leafy green vegetable in garlic and oil. When in a rush, my mom would just sprinkle some Italian grated pecorino or parmigiana cheese on top of just about any vegetable, and transform a bitter green into a delicious dish. Such creativity!!

My love of dandelions, especially at this time of year, when they are beautiful and plentiful in our markets, has caused me to embrace my creative side (which isn’t much to speak of), and come up with some different ways to make this bitter green. I could indeed make them every night, but sautéed with garlic and oil and sprinkled with Italian cheese was starting to get a little boring. (But please do check out that recipe in the archives. It’s delicious in all it’s simplicity.) So I started to think with the creative side of my brain, and an idea came to me! We make escarole and beans (please check that out in the archives as well)….why not dandelions and beans? Dandelions are bitter, so I then thought that maybe I should add some tomatoes to sweeten the dish a bit.   The result was amazing! I’m sure many of you already have made this discovery for any number of vegetables, but I get very excited when I make something delicious without using a recipe. Perhaps is it my love of recipes that has thwarted my creative side!

Let me assure you that no matter how hard you try to disguise or enhance the taste of most vegetables, you’ll still have that one child, who won’t eat them. However, my experience has shown me, that once they are grown adults, they will start to beg you for these very dishes. Don’t give up. They will come around….eventually!

RECIPE:  to be eaten as a main dish or a side dish

2 to 3 bunches of dandelions

2 lbs cherry tomatoes, halved

2 15 ounces cans of cannellini beans

1/2 cup olive oil

4 cloves garlic, sliced

1 TBSP sea salt, plus more,  to taste

Black ground pepper to taste.

  1.  Cut off some of the ends of the dandelions and soak in cold water.  You may have to drain and repeat this process several times to make sure the dandelions are clean and free of sand and grit.   I usually put 2 tsp. of white vinegar in the water for the first soak, as I read somewhere (who remembers where?!) that this will help in the cleaning process.
  2. Once cleaned, put in a large pot, covering the dandelions about 3/4 of the way with water.   Add the salt.  Cover and bring to a boil.  Once boiling, uncover and cook for about 30 minutes, until tender….but not too tender.
  3. Meanwhile, in a large skillet (large enough to hold all the dandelions and the sauce), saute the garlic in the olive oil for several minutes.  Then add the tomatoes, another sprinkling of sea salt, to taste. Cover and cook over low heat for 15 minutes or so…..until broken down a bit into a sauce.
  4. Add the beans and cook until heated through.
  5. Once the dandelions are cooked, drain well.  Add to the tomato mixture and toss well.  Adjust the seasonings, adding salt and pepper to taste.
  6. Serve with grated pecorino romano or parmigiana cheese.
  7. Call the kids.  They’re going to love it…….maybe!

dandelions wahingdandelions washed 2dandelions tomatoesdandelions garlicdandelions tomatoe:garlicdandelions cooked2dandelions pan 1dandelions pan 2dandelions plated *?dandelions dishdandelions pan 4 **?

Spaghetti all Gricia

Gricia plated ***


If you love Spaghetti Cacio e Pepe and/or Pasta Carbonara, stand back! The best is yet to come. Spaghetti alla Gricia is a delicious variation of the two, and just as easy.

While my mom often made a dish something like this with peas (bacon, onion, olive oil), it wasn’t until I was watching Mario Batali on The Food Network many years ago, that I learned that this was an actual dish, minus the peas. As a matter of fact, you can find my mom’s take on this (with the peas) in the archives, under Pasta Asciutta.

I recently ordered Spaghtti alla Gricia at a restaurant in Sarasota, Florida, and I recalled that very episode on the Food Network.   Of course I didn’t have my recipes with me in Florida (although sometimes I do pack a few to bring with me just in case) , but thanks to technology, I was able to go online and find this episode with Mario Batali. I couldn’t wait to give it a try. As you’ll see from the pictures, I even bought his brand of pasta, as a tribute.

The key to this very simple recipe is to use the very highest quality ingredients you can find.   Also, if you can find guanciale (cured pig’s jowl) in your market, this adds flavor, but certainly pancetta or bacon will do just fine, just make sure they are thick cut. I used pancetta, about a half inch thick. The other minor change that I’ve made is to add a bit of the pasta water while mixing the spaghetti, to moisten the sauce just a little. You can omit this if you like it just as is.

Enjoy!

RECIPE:  serves 4

2 TBSP extra virgin olive oil, plus 2 extra TBSP

1/4 tsp. crushed hot pepper flakes or to taste (may omit completely)

1/2 pound guanciale, pancetta or bacon, thick cut, and cut into 1/4 inch pieces

1 small onion, finely chopped

2 cloves garlic, finely chopped

1/4 cup finely grated pecorino Romano cheese, plus extra for serving

salt and pepper to taste

1 pound spaghetti

  1.  In a 12 to 14 inch sauce pan, heat 2 TBSP olive oil over high heat.  Add the chile pepper, if using, and pancetta and render the fat from the pork.  Cook on medium heat until the meaty parts are browned and the fatty parts are cooked, but still transparent.
  2. Remove the pancetta and put on a paper towel to drain.
  3. Add the remaining oil, onion and garlic and cook gently until golden brown.
  4. Return the pancetta to the pan and keep warm.
  5. Meanwhile bring a pot of salted water to a boil.  Cook the spaghetti until al dente.  Drain the pasta, saving a little bit of pasta water should you need it to moisten the dish, and add the spaghetti to the saucepan with the pancetta.
  6. Add the pecorino Romano cheese, toss over medium high heat for 1 minute, adding a little bit of pasta water if necessary, mixing well and creating a somewhat creamy sauce.
  7. Serve and pass more cheese and some freshly ground pepper.

Gricia ingredientsGricia pancettaGricia pancetta 2Gricia pancetta pan1Gricia pancetta pan2Gricia pancetta doneGricia pan pasta 1Gricia pan pasta3Gricia pan pasta 2Gricia plated ***


Cacio e Pepe

cacio plate closeup *?

Cacio e Pepe is a Roman pasta dish that boasts that it only uses 3 ingredients…cheese, pepper and pasta. When in Rome, this dish will be prepared tableside, in a giant wheel of pecorino cheese, indeed just using the cheese, pepper and spaghetti. A little bit of pasta water mixes in to make it a delicately, creamy pasta that truly is “to die for.” You may be doubtful that this could be possible, with only those few ingredients, but it truly is heaven. Twenty years ago, I ordered this dish in a small trattoria in Rome, just to see what the fuss was all about. I couldn’t believe my taste buds! Years later, I had this dish again (prepared in the wheel of cheese) on the lower Eastside of Manhattan, at a restaurant bearing it’s name, “Cacio e Pepe,” which is still there on 2nd Avenue .  There was something in this spectacularly presented pasta dish that reminded me of something from my past. It reminded me of my all-time favorite way to eat pasta….with nothing but butter and grated Italian cheese. I loved this as a child. I especially loved it as a teenager, looking for comfort food to relieve the stresses of teenage life. In college, it was a sure way to fill up your stomach, when you just couldn’t eat any more of that cafeteria food. As a young bride, trying to live on a teacher’s salary, it was a delicious way to stretch a very minimal food budget. (I think we ate this twice a week for 2 years). As a parent, my son spent many years eating pasta only this way.   And now, my grandchildren prefer this to just about anything else I might offer them. Perhaps this is just an Italian thing, but “pasta with butter,” as we call it, has been at the top of our “ comfort food list” for decades!

The true version of cacio e pepe is made in a bit of a more complicated manner than my version, but it’s worth taking note of because it is perhaps more refined. For all these years, I’ve simply put a generous amount of butter in a bowl and then added lightly drained pasta, a good bit of cheese, and tossed. I’d add a little ground pepper at the end. The Roman, and true version, of this pasta doesn’t include butter, but it does include a good bit more of the pasta water. However, upon researching this dish, I came across so many different variations of this recipe, and as always, it got a bit more complicated. Obviously we don’t have wheels of pecorino cheese sitting in our kitchens, so most recipes now have us melting butter together with olive oil (or maybe no olive oil at all) and pepper, and then adding the pasta, pasta water and cheese. Give it all a good mix and wow is this good!

You can really play around with this recipe, making it to your own taste. You might like more cheese, or perhaps no olive oil, just more butter. Even the order of the ingredients affects the taste. It’s up to you to make this dish your own. Keep experimenting with these simple ingredients, and it might just become your “comfort food” of choice.

I experimented by trying many of the various recipes that I found in several of my Italian cookbooks ( boy was this fun), and we were very happy indeed with the following, which is a combination.

RECIPE:  serves 4

1 pound spaghetti

1/4 cup extra virgin olive oil

1 stick (8 TBSP) unsalted butter

Freshly ground black pepper, depending on taste, but you can use up to 1/4 cup.

1 1/2 cups freshly grated Pecorino Romano cheese

1 1/2 cups freshly grated Parmigiano Reggiano cheese

extra cheese for serving

  1.  Bring a large pot of salted water to a boil.
  2. In another large pot or skillet, add pepper and heat for a few minutes, shaking the pan. Then add the oil and butter and stir until butter is melted.  Remove from the heat.
  3. Cook pasta until al dente.  Drain, reserving 1/2 cup of the cooking water.
  4. Add 1/4 cup water to the oil and butter.  Then add the pasta, tossing over medium heat.  Add the cheeses and a little more water, as needed.  Toss to combine well.
  5. Serve immediately and pass more cheese.  I always like another sprinkle or two of pepper.

cacio ingredientscacio pepe

cacio pan 2cacio pan 3cacio pan 4cacio pan 5cacio pan 6cacio bowl***cacio plate closeup *?


Beef Bone Broth

bone-broth-plated

If you haven’t heard by now of all the health benefits of bone broth, then it’ s time to take note.   We’ve all heard the scientific evidence that chicken soup really does have healing powers. Our mothers were right to force feed us homemade chicken soup when we were sick, More and more research is out there now, further revealing more benefits of bone broth. I won’t bore you with all the scientific facts, but I will share some simple benefits that make bone broth such a miracle-type food. Bone broth helps heal and seal your gut, as well as promote healthy digestion. It will reduce joint pain and inflammation, courtesy of chondroitin, sulphates, glucosamine and other compounds extracted from the boiled down cartilage. It promotes strong, healthy bones because it contains high amounts of calcium, magnesium and other important nutrients. It also inhibits infection caused by viruses and flu. It also promotes healthy hair and nail growth, thanks to the gelatin found in the broth. It fights total body inflammation, thanks to the amino acids such as glycine, proline and arginine.

All the above can be attained by simply cooking bones in water for many hours, and then drinking the broth. What amazes me the most is that, before all this scientific evidence came out, mothers instinctively knew that this was nourishing for us somehow. If they threw a lot of vegetables and seasonings in a large pot of water, with a chicken, turkey or beef ribs, they knew that the result was healthy for us.  Mothers’ intuition!  Now we know that this is indeed the case. A slow cooking soup is medicinal, as well as delicious. When I think back on my childhood, I clearly remember so many kitchens filled with the aroma of delicious soups , simmering on the stoves for hours. The aroma filled the entire house. As women/mothers joined the work force, canned soups came in handy. It was better than no soup at all, but I think we’ve gone full circle and realize the benefits of homemade. Slow cookers have greatly helped us with this.

The past year or two, I can’t make enough bone broth. I’ve made so many delicious variations on soups that have delighted our taste buds, as well as cured a common cold or two. But I have to admit that thinking about fortifying my bones, hair and nails, and fighting inflammation has greatly influenced my desire.   Healthy digestion doesn’t hurt the cause either. It’s a win/win situation……absolutely delicious, and so very, very good for us.

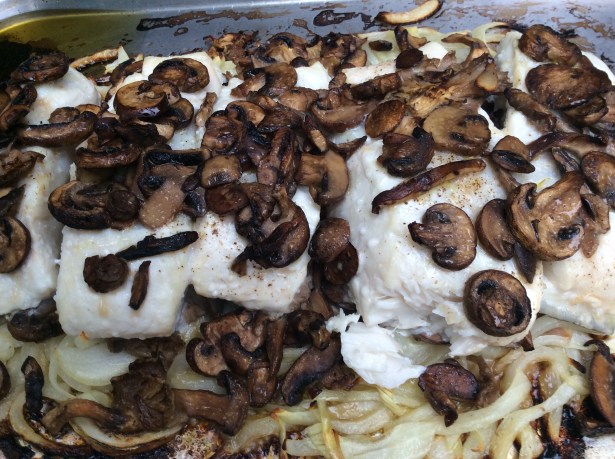
I’m going to share a recipe for beef bone broth, which I then turn into a hearty, mouth watering, and oh so healthy, beef with mushrooms and vegetable soup.

I make a huge pot or two, at one time, so that I can strain some for further use of the broth. You will find yourself with containers galore, but you can freeze them and defrost as you desire. Believe me, it won’t last long. They keep disappearing from my freezer!!

RECIPE:  yields about 3 quarts

2  pounds bone-in beef short rib

2 1/2 pound beef shank or oxtail

1 1/2 pounds beef spare ribs, or any other cut of beef with bones you like

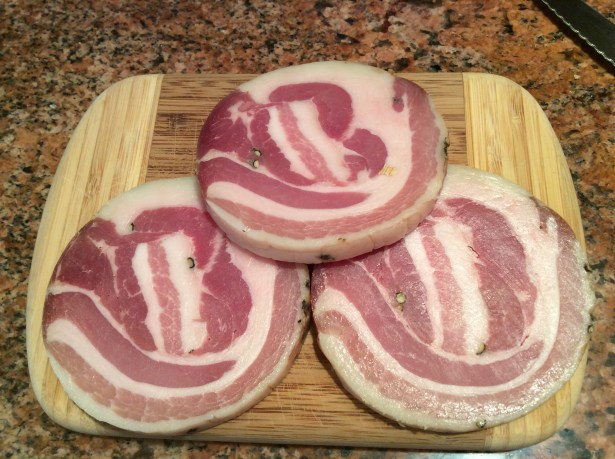
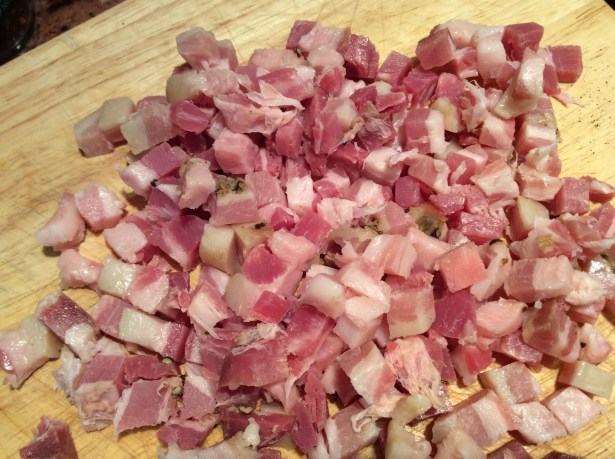
Beef bones…just any beef bones without meat, if you like.

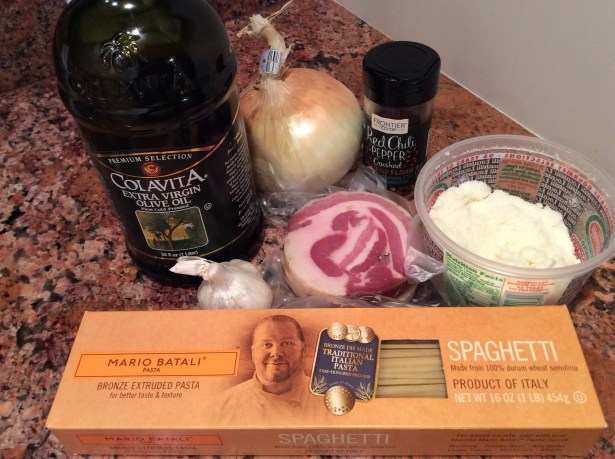
2 TBSP extra-virgin olive oil

2 TBSP tomato paste

1/4 cup apple cider vinegar (*the vinegar extracts the minerals out of the bones into the water. Who knew?? I use Braggs as it is unfiltered and unpasteurized, but any will do the job)

3 carrots, peeled and chopped

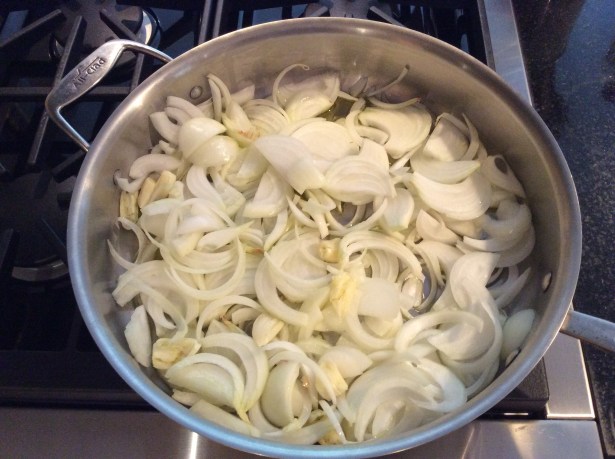
2 onions, quartered and peeled

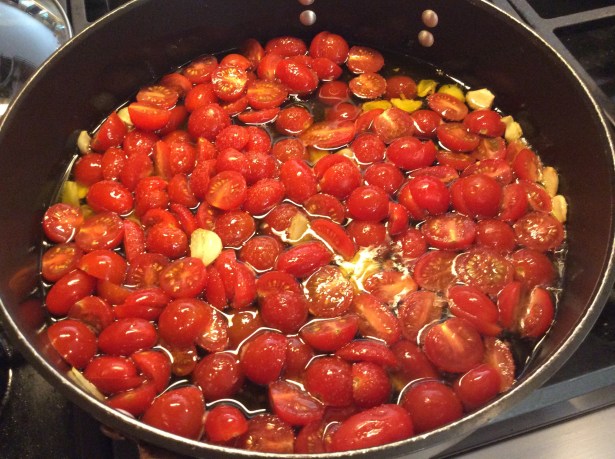
1  (14.5 ounce) can of tomatoes, whole,  peeled or diced.

6 to 8 cloves of garlic, smashed

2 bay leaves

1 bunch flat parsley

1/2 bunch fresh thyme

1/4 ounce dried shiitake or porcini mushrooms

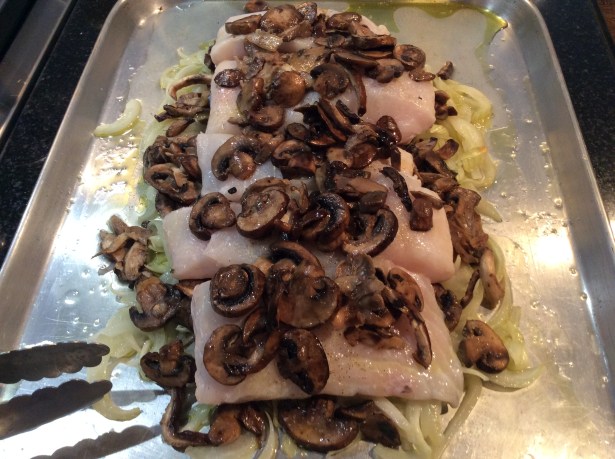
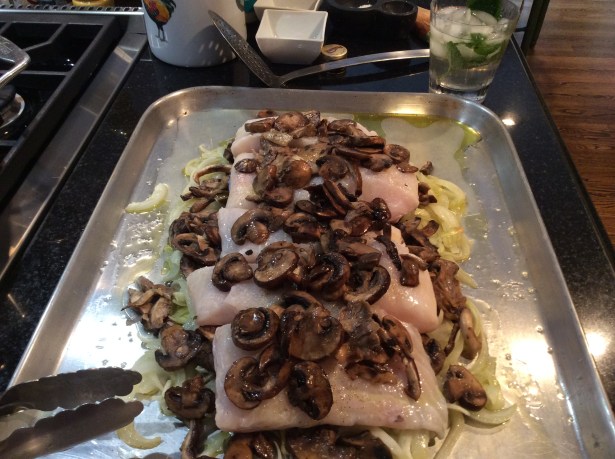
1 pound shitake mushrooms, sliced   (they’re anti-viral, anti-tumor)

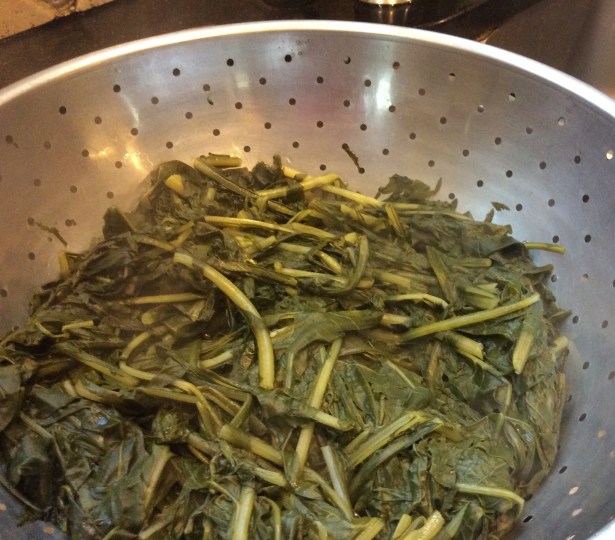
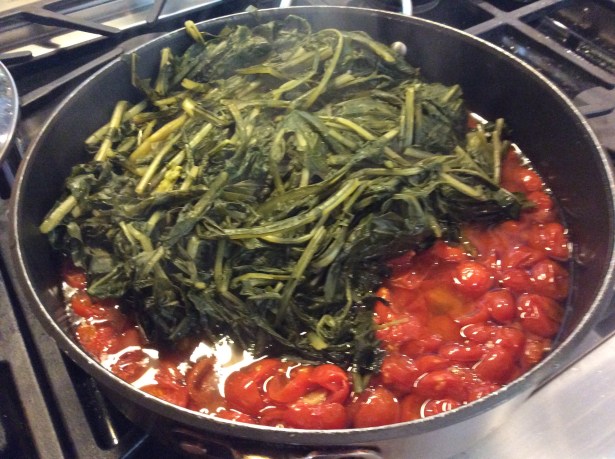
1 pound baby spinach

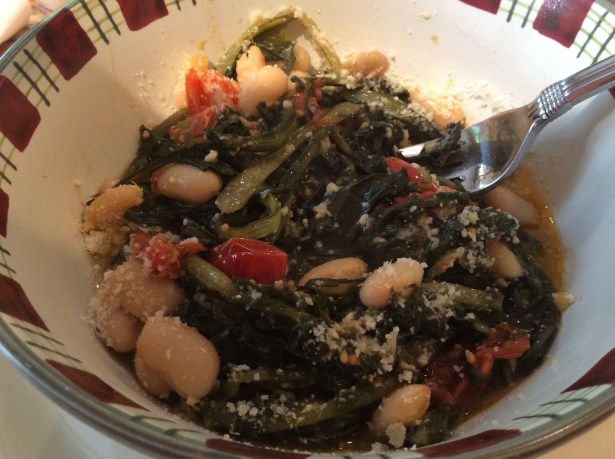
1 cup barley, faro, kasha or grain of choice, cooked.

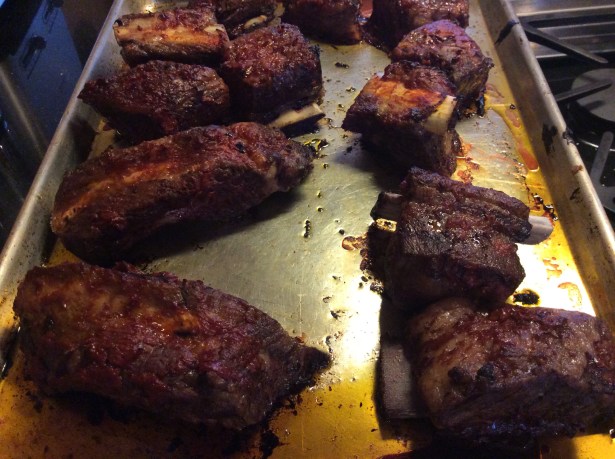
  1.  Heat oven to 350 degrees.  Place meat and bones in a roasting pan or on a rimmed baking sheet.  Drizzle with olive oil, turning to coat, then brush all over with tomato paste.  Roast until browned, 30 to 35 minutes.  They don’t need to cook all the way through, but to just develop some color. (this can be done the day before)
  2. Put roasted meat and bones a 12 quart stockpot and add vinegar and enough water to cover by 3 inches (about 6 quarts)  Bring to a boil, then reduce to a low simmer, uncovered for 2 to 3 hours.  While simmering, you can skim off the fat if any forms on top.
  3. Add all the remaining ingredients, except the mushrooms, spinach, and grain of choice.  Continue to simmer, uncovered, for a minimum of 3 hours, and for as many hours as possible, adding the mushrooms when it has 2 hours left to go. I have let this simmer for as many as 10 hours, adding a little bit more water if needed.
  4. Remove meat and bones with a slotted spoon or tongs.  **If you want some plain broth, at this point just strain, by putting the broth through a fine mesh strainer and store in heatproof containers.
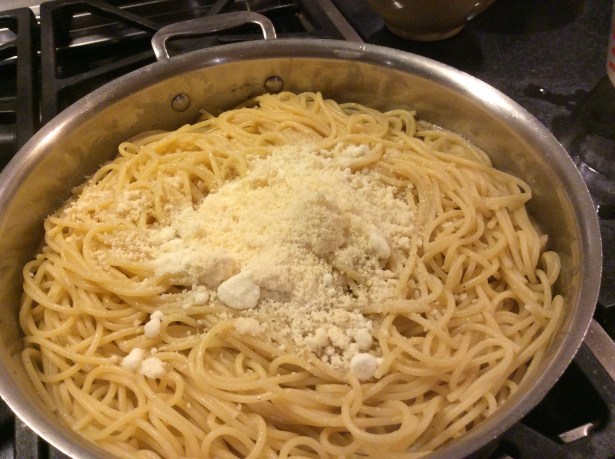
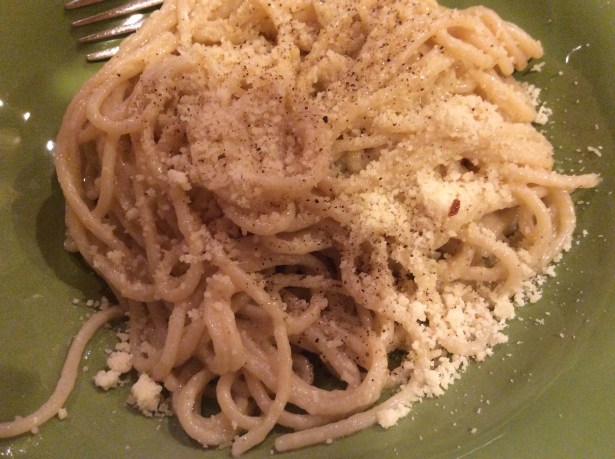
  5. At this point, after removing the meat, I take the meat off the bones, shredding it.  I add the spinach, and the shredded meat back into the pot, and cook through for 10 minutes or so, until spinach wilts.
  6. Add cooked grains.
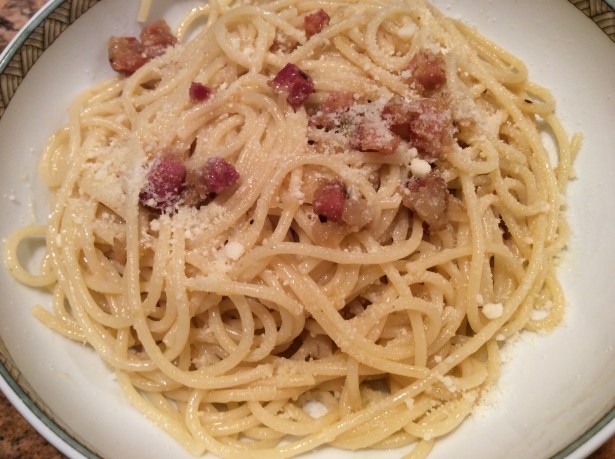
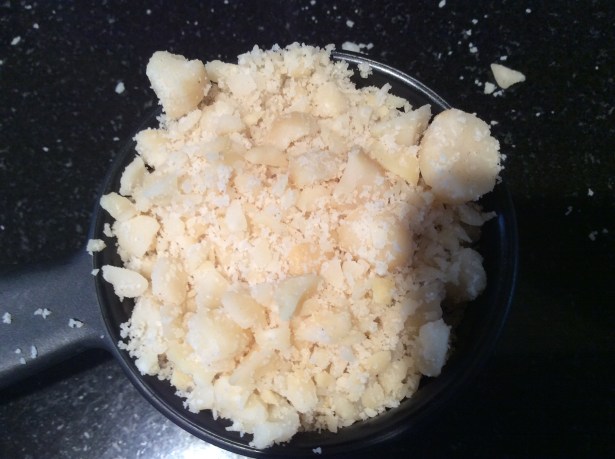
  7. Plate and pass grated Parmesan cheese, if desired.
  8. *NOTE: Please go back in the archives to my chicken soup recipe. To enhance the benefits of bone broth, take the chicken out when cooked, and remove meat from the carcass and save for later. Return the carcass to the pot, and cook for as many more hours as you can.  Then add the meat and faro into the pot.   You can also do this part on another day. Just save the bare bones and some of the stock, add more water and seasonings and cook for several hours. 
  9. bone-broth-rawbone-broth-oilbone-broth-pan-1bone-broth-pan-2bone-broth-pan-3bone-broth-vinegarbone-broth-pot-waterbone-broth-veggiesbone-broth-pomibone-broth-veggie-soupbone-broth-spinachbone-broth-meat-plated

bone-broth-shreddedbone-broth-plated